Articles, products, and services offered on this site are for informational purposes only. We are part of the Amazon Services LLC Associates Program, an affiliate advertising program. Amazon.com is compensated for sales resulting from links on our website.
Please review our disclaimer before acting based on anything you read or see.
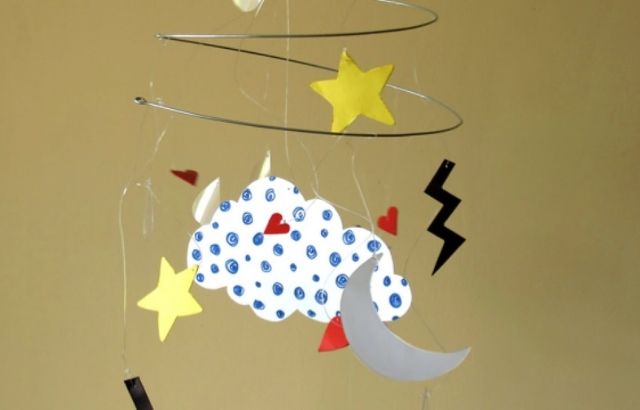
Well! Since my childhood, I am a very creative mind and love to do art projects independently. Last week, I searched for a simple mobile art project to hang in my daughter’s room, so I decided to do it with crummy plastic junk. So in this article, how to make mobile art, I will share simple steps to make mobile art. These are interesting kinematic art projects that will dance on puffs of air and float in the wind.
What is a Mobile Art?
The precise definition of mobile art is that it is a type of kinetic sculpture constructed to benefit the principle of equilibrium. It consists of several rods, from which weighted objects of different types hanged irregularly. The items hanging from the rods balance each other so that the rod remains more or less horizontal.
They represent the kinetic type of mobile sculpture because, unlike traditional sculptures, they do not remain still but are portable, set in motion by air currents, a slight touch, or even a small motor.

History of Mobile Art
Marcel Duchamp initially suggested the word mobile for a 1932 Paris exhibition of such works by the American artist Alexender Calder born in 1898. One of his first mobiles consists of spheres of different colors, which were motorized to move up and down with curving wires at different speeds. He may not have invented the baby mobile, but his large sculptures, dubbed and concise mobile art because of movable parts and wires, were the encouragement for the new generation.
Assembling of tools and parts:
The first step is to search for the things that will hang from your mobile. For a simple mobile, the parts should be small and light; you should remember some types of cool mobiles made with large plates of welded steel.
I opted for little alphabet blocks for my daughter’s mobile sunk with a tiny screw eye attached to the wire.
- The first step is to arrange a hanging wire; if you want to use more significant stuff, you can opt for welding rods with nice copper coating and comes in 1/16″ size.
- For smaller objects, the piano wire is best, which is available at remote control airplanes shops. This is available in very accurate diameters like 0.020″ to 0.1″ and has a size of 0.1″; it should be stiff and springy too.
- Then you will need some specific tools like pliers, round jaw pliers, and nippers; these are helpful in circular bends in the wire.
- The jewellery shop owners also have these pliers in small sizes that are good to start with, but they can’t work with bigger wires.
- You need wire cutters, but using a larger size will save your hands from getting injured when dealing with copper and steel wires.
- Steel wire is tough to cut than copper wire, so a pair of more prominent needle noses will do the task of bending well.
- Whenever you are doing this project, make the best effort to get a hook in the ceiling.
- Because mobiles won’t sit well, hanging can be held together, and you can’t see them correctly until and unless they are suspended.
Start building
- You should start by connecting the two pieces.
- Now take the small piece of wire and bend it to make a loop from the middle, and then bend a loop in each end, in such a way that the middle loop should rely on the top of the piece, and the last loops should be in the same plane.
- The design should be in such a way that the open side should be facing up.
- Now hang 2 of your pieces from the hook to balance a mobile. Now make a bend in loops of wire at either end of the wire.
- Hang the one object on the one end and two object pieces on the other end.
- Search for the balance point, and bend a loop at that point.
- It will take some time and practice to set this loop on the top of the side of the wire and incorrect position.
- Without moving the pliers, I find it easy to bend it completely around one point due to this loop will get the correct position.
- You can easily make a mobile with sticks using glue, needles, pins, scissors, thread, crayons, paints, and cardboards.
- The things that hang with the rods balance each other to remain in a horizontal position.
- Each rod hangs from one string, which is free to rotate about the string.
- It enables the balance in the parts of mobile to hang freely in space so that its design can be seen clearly without coming in contact with each other.
- Mobiles are standard in the children’s nurseries, where they hang them to give infants an element of entertainment, fun, and visual stimulation.
Types of Mobiles
There are several types of mobile arts used for different purposes like decoration, suspended sculptures from the ceilings, standing objects whose arms wave in the air, Remains of wind chimes made from bone, wood bamboo, and seashells. Some of the projects have voluminous diamonds and geometric forms created from thin reeds and straws.
- People also want to know the meaning of custom mobile, which means that your mobile does not have the latest android version in it.
- Whimsical mobiles are the best options to use in babies’ nurseries to attract them and make them happy.
- These are made from ribbons, lace, seashells, white feathers, and wooden beads.
- Another type is handmade mobiles, also called hand crochet mobiles.
- You can decorate your room with geometric mobiles that are eye-catching as well as an excellent example of an art recreation for your kids.
- You can learn about geometric shapes and make them with straws and yarn.
- The most commonly used is a basic mobile, in which a sculpture is formed of delicate components suspended in the air and moves in response to air currents or motor power.
- Many Italian artists have shared their professional skills and techniques. They masterfully combine collage elements in your artwork with colour, form, texture, balance, design, line, and strings in making creative mobiles.
- They are famous for their mechanized mobiles, which look like motorized junk.
- Mending together the materials like metal wheels, tube wires, cast iron wood engines, and rear-view mirrors, they wanted to show modern life into art.

How to Make Mobile Art
Mobile arts are very inexpensive and simple to manufacture at home. They are excellent projects for children to work on, and if you use durable materials, they may even be hung as decorations in several baby’s places.
Surely you have at home a lot of materials that you can use for this craft, but everything you might need you can find in haberdasheries, bazaars, and even online stores. The elements that decorate the mobile can be as original as you want, but soft silhouettes are the most suitable for a baby. So, let’s get into business!
What you need to make mobile art
- Paper cards
- Pieces of cardboard
- Colored, patterned, or printed paper
- Thread
- Needle
- Glue
- Pencils
- Scissors
- Rulers
Making Mobile Art: Step by Step
- Glue the paper with the pattern, colors, or designs you have chosen on a cardboard with a glue stick. This way, the butterfly will have two colors depending on which side you look at it.
- On a piece of cardboard, draw a butterfly that will help you make the rest so that they are all the same. If you want to make butterflies in different sizes, we suggest you make three different models.
- Cut out the models you have created. Place them on the cardboard with the patterned paper you have chosen and outline. Cut out the butterflies.
- Sew the butterflies together, leaving a gap between them with colored or fisherman’s thread. Don’t forget to leave an extra wire to attach them to the mobile.
- To make the base of the cradle mobile, cut cardboard about three fingers wide and the length you want.
- Glue the two ends of the cardboard together to create a circle.
- Draw an imaginary triangle inside your circle and mark where each of the vertices would go. Mark it with a pencil. This is where we will place each of the butterfly strips.
- Sew each of the butterfly strips at the point you marked.
- Tie the ends at the top of the circle so you can hang the dream catcher from the ceiling or from a pendant you have over the base.
Importance of Making Mobile Arts at Home
The mobile crib is the first toy that a child has, it is a decorative element, but at the same time, it is a perfect tool to stimulate the baby’s senses. With this type of toy, we help the little one to develop his visual and auditory senses. In addition, the colors and shapes hanging from the toy, visual acuity, and color perception are stimulated.
It also improves little one’s capabilities to start working on hand-eye coordination; he will try to catch the colorful dolls that attract his attention. Therefore, placing a crib mobile is a great idea for a baby’s development. You can make a nursery mobile out of any item, even tree branches you find in your area. Of course, whenever you use any items from the street, you should be sure to clean and disinfect them thoroughly. Then apply a coat of paint to suit the nursery. You can hang simple, colorful balls from fabrics such as felt. Or create cute pom-poms from cotton fabrics.
Benefits of Mobile Art for Kids
- The creation of hanging mobile art projects can be fun and exciting for kids in the classrooms.
- Hanging mobiles gives children a chance to use their hands more quickly while putting the thread and string into the object’s tiny holes.
- According to the research, children also get confidence when they use and handle the tools while making any mobile object.
- Moreover, mobile art permits children to concentrate more and to improve their skills.
- While doing these tasks, they get more familiar with the sizes, shapes, weights, and textures.
- Mobile art inspires children to improve their imagination and creativity with a wide range of materials.
- Children need to do experiments with all such materials they may or may not be known with.
- Completing the art projects, mastering skills, and learning to express themselves helps kids increase self-esteem and self-expression.
- These tasks also help them to come up with positive emotional responses in stress conditions.
- Time-taking projects, such as waiting for dryness of glue and waiting for painting, helps to develop patience in kids.
- Drawing, sculpting, and painting help to develop visual skills.
- The projects also help to develop mental flexibility and self-control.
How to Make Mobile Art: FAQs
What are the mobiles in art?
It is a type of moving sculpture constructed to take advantage of the principle of equilibrium. It consists of rods, from which weighted objects or furthermore rods hang. The things hanging from the rods balance each other so that the rods remain more or less horizontal.
How do you create a balanced mobile phone?
Start with one layer of your mobile; once the straw is balanced, tie your first shape to one end of the straw. Tie the second shape to the other end of the straw up in the air. Balance the straw by moving one of the figures along with the straw.
What wire is used for mobile phones?
Most mobile phones use twisted pairs of copper wires; the most common type is 4 strands. This consists of red and green wires, making the yellow and black cables make the other pair.
Conclusion
So to end the topic, how to make mobile art, it is a fact that hanging mobiles are the suitable decoration pieces for any occasion, with the decorations according to the theme of events. However, any child can make it with his effort and interest. It depends on the availability of things and objects to handle them with confidence. The tasks will help them to improve their potentials and self-confidence.
Comments are closed.