Articles, products, and services offered on this site are for informational purposes only. We are part of the Amazon Services LLC Associates Program, an affiliate advertising program. Amazon.com is compensated for sales resulting from links on our website.
Please review our disclaimer before acting based on anything you read or see.
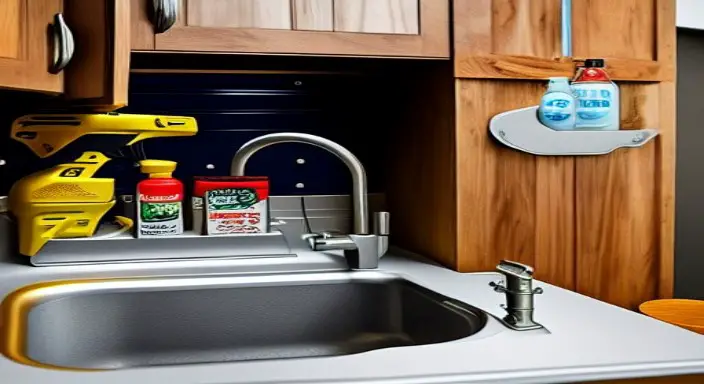
Installing a utility sink in the garage can be a rewarding and practical project to increase your garage’s functionality and convenience. Utility sinks can wash hands and tools, clean up messes and spills, and store and organize materials. Let’s learn how to install a utility sink in the garage.
Installing a utility sink in the garage can be relatively easy, provided you follow the proper steps:
- Gather the Necessary Supplies
- Assess the Space Available for the Utility Sink
- Prepare the Utility Sink for Installation
- Shut off the water supply
- Measure the area
- Cut the hole for the sink
- Install the faucet and supply lines
- Place the sink into the hole
- Connect the drain and overflow
- Install the supply lines
- Secure the Sink to the Wall
- Connect the Water Lines to the Sink
- Seal the Sink to the Wall
- Test the Sink for Leaks
- Turn on the water supply and test the sink
- Finishing Touches
But before you get started, it’s important to ensure you have all the necessary materials and tools for the job.
So, if you’re ready to take the plunge and upgrade your garage with a utility sink, keep reading to learn all you need to know.
How To Install a Utility Sink in the Garage
1. Gather the Necessary Supplies
Before installing a utility sink in your garage, gathering all of the necessary supplies is important.
You will need a utility sink, utility sink faucet, plumbing supplies, and tools for installation.

Make sure to purchase the right size utility sink and the right type of plumbing supplies.
Additionally, you will need to have the right tools for the job. Having all these supplies readily available before you start will ensure a successful installation.
2. Assess the Space Available for the Utility Sink
The first step to installing a utility sink in the garage is assessing available space.
Measure the area where the sink will be installed, considering the dimensions of the sink itself and the need for additional space for tools, supplies, and other items.

It will help you determine the size and placement of the sink and whether or not you need to make any modifications to the area to accommodate it.
Once the size and location do determine, you can begin the installation process.
3. Prepare the Utility Sink for Installation
Before beginning the installation process, the utility sink must properly prepare:

- Gather all needed supplies, ensuring that the sink is the correct size for the space in the garage.
- Measure out the area and mark the placement of the sink. Ensure the sink is level and the surrounding floor and walls are free of any obstructions.
- Place a small amount of sealant around the edges of the sink to ensure water does not seep into the surrounding area.
Once the utility sink is properly prepared, the installation process can begin.
4. Shut off the water supply
The fourth step in the installation process is to shut off the water supply. It is necessary to install the utility sink in the garage successfully. It should do with caution and care.
Locate the shut-off valve near the water heater or on the main water line to shut off the water supply.

Turn the valve in a clockwise direction until it is completely closed.
Once the valve is shut off, the water lines should drain by opening the faucets and flushing the toilet. Once the water is completely drained from the plumbing, the utility sink can install.
5. Measure the area
Once you have chosen the correct location for your utility sink in the garage, the next step is to measure the area. Depending on your chosen sink size, you will need to measure the area’s height, width, and depth to ensure that the sink fits properly in the space.

Measure twice so there are no surprises when you go to install the sink. If the measurements don’t fit, consider adjusting the sink size or relocating it to a more suitable area.
6. Cut the hole for the sink
After the final preparation steps, it is time to cut the hole for the sink. Use a jigsaw to cut the sink opening at the top of the cabinet. Take your time to ensure that the hole is the same size and shape as the sink.

Also, leave enough space around the sink to install the faucet and other fixtures. When cutting the sink’s hole, wear safety goggles and a dust mask to protect yourself against debris and dust.
7. Install the faucet and supply lines
Once you have all the pieces, installing the faucet and supply lines is next. First, you’ll need to install the faucet onto the sink. It can do by lining up the holes in the sink and securing it using the included mounting hardware.

Use the plumber’s tape around the threads to ensure a tight seal. After installing the faucet, attach the supply lines to the faucet and the water supply, ensuring that all connections are secure.
Once everything is in place and secure, it is time to turn on the water and ensure the sink is properly working.
8. Place the sink into the hole
Once the hole is cut, the next step is to place the sink into the hole. Ensure that the sink is centered and level before affixing it in place.
Use a level to ensure that the sink is properly aligned. Secure the sink to the Wall by using the appropriate screws and washers.

Connect the drainpipe and any mounting hardware using the proper sealant to ensure a watertight connection.
Connect the hot and cold water lines according to the manufacturer’s instructions. Finally, check the sink for leaks and test the faucet to ensure it works properly.
9. Connect the drain and overflow
Complete the installation of your utility sink in the garage; connecting the drain and overflow to the plumbing is important.

Depending on your sink type, you may need to use a P-trap, a combination of pipes and fittings, or other specialized parts. Be sure to check with a plumbing professional if you have any questions.
Always use the manufacturer’s instructions when connecting the drain and overflow for your utility sink for the best results.
10. Install the supply lines
Once your utility sink is in place, installing the supply lines is next. Install the hot and cold supply lines to the designated locations on the sink. Ensure the washers are in place on the connections and the connections are finger-tight.

Then, use an adjustable wrench to tighten them further. Turn on the water to check for any leaks.
If you find any, tighten the connections further. If the connections are still leaking, consider replacing the washers and connections.
11. Secure the sink to the Wall
Properly installing a utility sink in the garage is essential for proper functioning. After the sink is in place, secure it to the Wall to ensure it remains in place.
Position the sink so the tap faces outward, with the drain below facing the appropriate direction. Secure the sink to the Wall using lag screws and washers.

Secure the sink from the front to the back of the cabinet. Use an appropriate drill bit for the size of the lag screws and washers.
Ensure the sink is level and the Wall is strong enough to hold it. If you need to, use a stud finder to locate any studs behind the Wall to mount the sink securely.
After ensuring the lag screws are tight, finish the installation by caulking around the edges of the sink.
12. Connect the Water Lines to the sink
Installing a utility sink in the garage is a great way to add a convenient workspace for tackling various projects. The process is relatively straightforward and requires connecting the water lines to the sink:

- Turn off the main water supply.
- Connect the water lines to the sink. If using a flexible water line, secure it to the underside of the sink with a support bracket.
- Using a threaded connection, use a water line sealant to prevent unwanted leaks.
- Turn the water supply back on and check for any leaks.
With these steps, the utility will sink up and run quickly.
13. Seal the sink to the Wall
Installing a utility sink in the garage is an excellent way to increase the functionality of the space.
After preparing the Wall and readying the sink for installation, the final step is to seal the sink to the Wall:

- Use a silicone caulk to apply a generous bead along the edges of the sink, ensuring a tight seal.
- Use a caulk gun to apply the caulk along the sink’s sides and back, paying particular attention to the interior corners. To ensure the caulk adheres properly, use a putty knife to spread it evenly and press it into the edges.
- Use a damp cloth to remove excess caulk and smooth the surface.
With these steps, a utility sink for the garage can be installed with ease and provide years of useful service.
14. Test the Sink for Leaks
Installing a utility sink in the garage is a great way to keep your space organized and enhance functionality. Once the sink is properly installed, testing it for potential leaks is important.

You can do this by turning on the water and checking the sink for any drips or leaks at the base of the sink or drain.
If any water is spotted, the issue should address immediately to avoid damage to the surrounding area and potential mold growth. If there are no leaks, the sink is ready for use.
15. Turn on the water supply and test the sink
Installing a utility sink in the garage is a great way to add a convenient and practical feature to the space. To complete the installation:

- Please turn on the water supply and test the sink to ensure it is properly connected.
- Ensure the shut-off valve is open and the connections are secure.
- Turn on the main water supply and check for leaks from the sink’s pipe connections.
- Once the connections are secure, turn on the faucet and let the water run for a few minutes.
- Look for any leaks or dripping from the faucet and underneath the sink. If all is in good order, the installation is complete.
16. Give finishing touches
Installing a utility sink in the garage is a great way to add a functional and stylish utility to the space. Before beginning, ensure that the supplies needed are all available. It includes the sink, faucet, shut-off valve, water supply lines, and other necessary parts.

Once everything is ready, connect the water supply lines to the shut-off valve and faucet. Then, attach the faucet to the sink and secure the sink to the Wall with the mounting hardware provided.
Finally, turn on the water supply and test the sink for leaks. With the finishing touches, you now have a fully functional and stylish utility sink in your garage.
Expert Opinion
Installing a utility sink in the garage is a great way to add a functional and practical space to the home. However, it requires some basic DIY knowledge and tools, but it can do in a few hours with a little patience.
Moreover, having a utility sink in the garage can offer great convenience and peace of mind for the homeowner.
So, if you’re looking for a great way to make your garage more useful, consider installing a utility sink.
Comments are closed.