Articles, products, and services offered on this site are for informational purposes only. We are part of the Amazon Services LLC Associates Program, an affiliate advertising program. Amazon.com is compensated for sales resulting from links on our website.
Please review our disclaimer before acting based on anything you read or see.
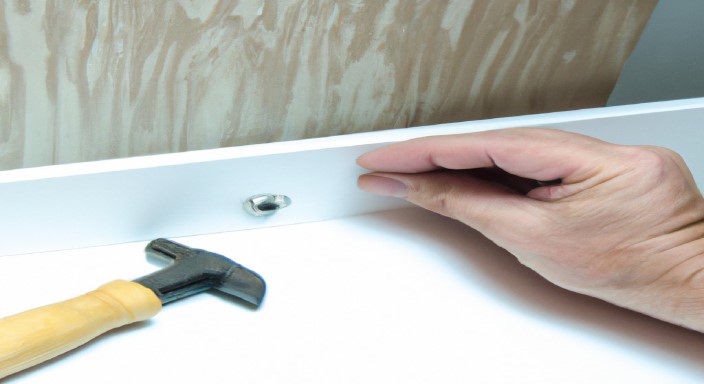
If you want to upgrade the look of a kitchen, living room, or bathroom, installing wall cabinets can be a great way to do so. With suitable materials and a little know-how, you’ll be able to install your cabinets securely and confidently. Let’s learn how to install wall cabinets without studs.
But what if you don’t have any studs on the wall? Installing wall cabinets without using studs may seem daunting, but if done correctly, it can be a simple and effective home improvement project.
The Home Affluence team will discuss the best techniques for installing wall cabinets without studs and provide step-by-step instructions for completing the project efficiently and safely.
After reading this post, you should understand how to properly and securely mount wall cabinets without studs. So read on to learn how to install wall cabinets without studs.
How to Install Wall Cabinets Without Studs
Follow the below steps;
- Determine where you’ll place your wall cabinets
- Decide on the size and quantity of cabinets
- Buy the tools you’ll need for installation
- Cut out the drywall to install cabinets without studs
- Install the metal frame that will hold your wall cabinets
- Install flooring if applicable
- Install drywall to make a smooth surface for cabinet installation
- Install your wall cupboards and doors.
- Add any necessary shelves or trimming.
- Take care of some final cleaning and touch-up jobs
Step 1: Determine where you’ll place your wall cabinets.
The first step in installing wall cabinets without studs is determining where they will take place. Consider the layout of the room and the size of the wall cabinets before deciding on the placement.
Measuring the space between the walls and the cabinets is vital to ensure they fit correctly.

Ensure enough clearance around the cabinets, so they are tight enough to open and close. Once you have determined the placement, mark the area with a pencil or other marker.
Step 2: Decide on the size and quantity of cabinets.
Once you’ve chosen what type of cabinets you plan to install, it’s time to move on to Step 2: Deciding on the size and quantity of cabinets.
This step is critical, as it will determine the layout of your cabinets and the total cost.

Start by measuring the area where you plan to install the cabinets and use that information to pick the right size for your space.
Then, decide how many cabinets you need to make the most of the space. Consider your storage needs and the size of the items you plan to store in the cupboards.
It does help you determine the number of cabinets needed.
Step 3: Buy the tools you’ll need for installation.
Now that you’ve chosen the suitable cabinets and determined the best placement, it’s time to purchase the tools necessary for installation.
You’ll need a drill, level, screwdriver, tape measure, stud finder, and wall anchors.

Your tape measure should be at least 25 feet long, as you’ll need to measure out the exact dimensions of the cabinets.
A stud finder is also necessary to locate the studs in your walls. Wall anchors will help you mount the cabinets securely if there are no studs.
Be sure to gather all of these tools before you begin the installation process.
Step 4: Cut out the drywall to install cabinets without studs.
Step 4 is the most time-consuming step of the entire installation process. You will need to carefully measure and cut out the drywall to make room for the cabinets.

Using a drywall saw and a level, carefully cut along the lines you previously marked. Be sure to cut slowly and carefully to avoid damaging the drywall and creating jagged edges.
Once the drywall does cut, you can begin installing the cabinets without worrying about studs.
Step 5: Install the metal frame that will hold your wall cabinets.
Now that your drywall is in place and you have pre-drilled your holes, it’s time to install the metal frame that will hold your wall cabinets.
Measure the height of your wall cabinets and the distance between the top of the wall and the ceiling.

Once you have the measurements, cut your metal frame pieces to the appropriate length using a hacksaw or metal saw.
Then, use the pre-drilled holes as your guide and secure the metal frame to the drywall with masonry screws.
Finally, ensure the frame is level and secure it with wall anchors if necessary.
Step 6: Install flooring if applicable
Installing flooring is an essential step in any renovation project. The installation process can vary greatly depending on the type of flooring chosen.
Generally, must prepare the subfloor to ensure the flooring material is level and secure.
Underlayment will also be necessary if a floating floor does install. Once the subfloor is ready, the flooring can lay and secured.

Depending on the type of flooring, you can do this with nails, glue, or a combination of both.
Installing flooring is labor intensive and often requires specialized tools, so it is best to leave this task to a professional for the best results.
Step 7: Install drywall to make a smooth surface for cabinet installation
Installing drywall is essential in creating a smooth surface for cabinet installation.
Before proceeding, it is crucial to measure and cut the drywall to the appropriate size and then use drywall screws to secure the drywall to the wall studs.

Once complete, the seams between the individual panels of drywall should be filled with drywall compound and then sanded to create a smooth surface.
With the drywall up, it is important to tape the seams with drywall tape, fill the video jointly with the drywall compound, and then sand the combination to create a smooth surface.
This process may need to repeat to ensure a completely smooth surface for cabinet installation.
With the drywall installed and finished, you can install the cabinets for a finished look.
Step 8: Install your wall cupboards and doors.
Installing wall cupboards and doors is the final step in any kitchen renovation.
It is crucial to ensure that your cupboards and doors install properly to ensure their longevity and provide a high-quality finished product.

It is vital to measure the wall and the cupboards and doors precisely. Once the measurements do take, the installation can begin.
It involves securing the cupboards to the wall, ensuring the door hinges connect fitted and adjusted, and ensuring the doors are aligned correctly.
If done correctly, installing your cupboards and doors will provide a professional and lasting finish to your kitchen renovation.
Step 9: Add any necessary shelves or trimming.
When completing the renovation project, adding any necessary shelves or trimming is essential.
You can use shelving to store items and display decorative pieces, while trimming can add a finished look to any wall, door, cabinet, or another surface.
Depending on the project, shelves and trim can be made from various materials and come in several sizes and shapes.

Additionally, it would be best to choose any frame to match the room’s overall color scheme and design.
With the right shelves and trim, a room can be transformed from dull to exciting, giving the whole house a polished, pulled-together feel.
Final step: Take care of some final cleaning and touch-up jobs
Once the renovation project is complete, it is vital to take care of some final cleaning and touch-up jobs.
It includes cleaning the construction site, disposing of any remaining materials, and cleaning the surfaces that paint or re-finished.

It is also essential to inspect the work that has to do to ensure no issues require additional attention.
Finally, any necessary steps to secure the area, such as touching up any worn paint, varnish, and other finishes and making sure all tools are stored away, to prevent any future accidents or damage.
Taking care of these final steps will ensure that the renovation project does complete efficiently and effectively.
Expert Opinion
Installing wall cabinets with studs is possible. You can do it with the right tools and a little extra effort. Remember to use heavy-duty adhesive to ensure the cabinets stay in place.
Be sure to correctly measure the area you want to install your cabinets and check for any wiring or plumbing before drilling any holes.
With the proper preparation and extra effort, you’ll have your wall cabinets installed without studs.
On the other hand, installing wall cabinets without studs is a great way to take advantage of unused space and give your kitchen or bathroom a much-needed facelift.
With suitable anchors, you can ensure the cabinets stay in place and offer the same level of support as studs. Hope you have learned how to install wall cabinets without studs.
Comments are closed.