Articles, products, and services offered on this site are for informational purposes only. We are part of the Amazon Services LLC Associates Program, an affiliate advertising program. Amazon.com is compensated for sales resulting from links on our website.
Please review our disclaimer before acting based on anything you read or see.
Having a car with beautiful paint is the biggest reward and the biggest challenge in making a car. Between finding a paint shop that completely repaints an old car, completing work to your satisfaction on time, and paying, painting a car can be a painful experience. In this guide, you will learn how to paint a car at home outside.
How to Paint a Car

Step 1: Choose your location wisely
Don’t rush to paint it correctly – painting a car takes a long time, so take a few days to do your job properly. Before you start drawing, you will need to find a suitable location for your DIY project. Make sure your space has enough space to work in the car, is well ventilated, and well lit. Choose an area with electricity and a minimum of dust. Avoid residential garages, as they often have stoves or heaters that create a fire hazard when in contact with paint fumes.
Step 2: Remove the rust, dent, and trim.
Ensure that the paint does not highlight any imperfections – remove visible dents, remove rust and remove chrome or plastic trim. After painting, the moldings and linings can be replaced.
Step 3: Grinding sand
Give the paint a smooth and flat surface to which it can stick – sand the whole car in a circular motion either on bare metal or on the original primer, or at least enough for the new paint to adhere. If you have little time, option 3 will suffice, but the best results will be from grinding to bare metal.
Step 4: Clean
Thoroughly wipe all vehicle surfaces with a rag and denatured alcohol or white spirit to remove any residual oil and prepare it for painting.
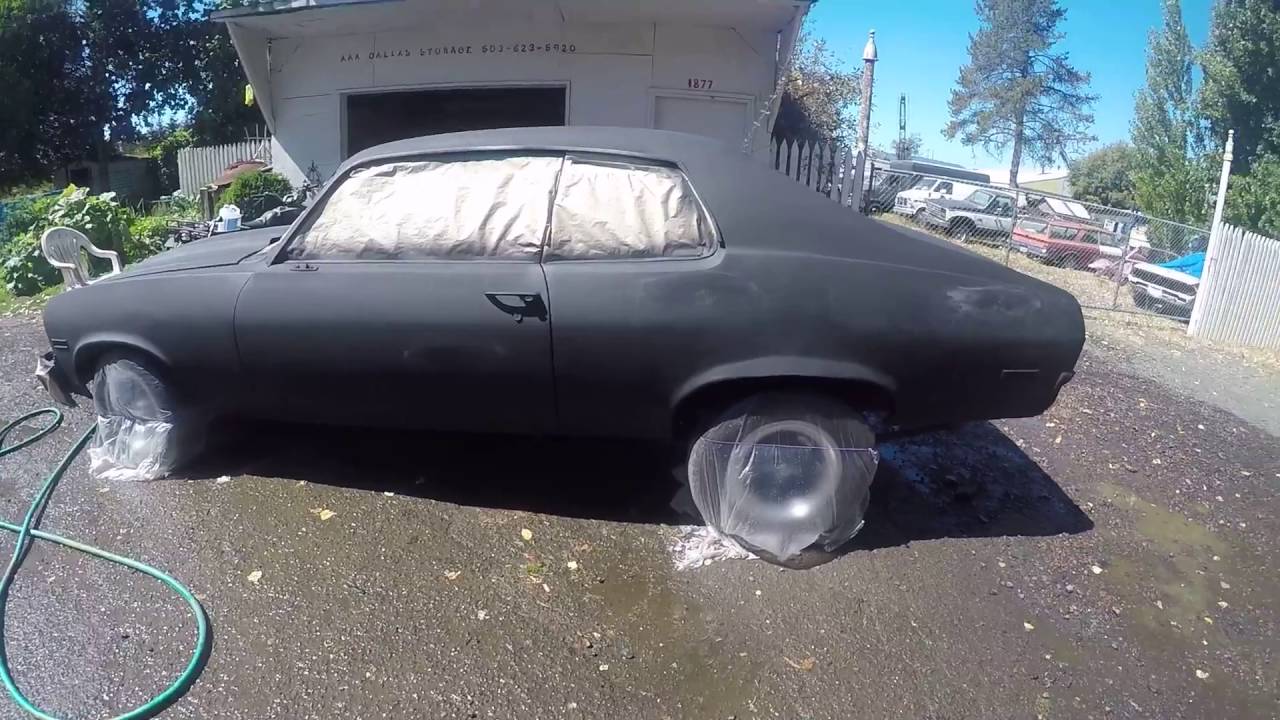
Step 5: Strip surfaces
Cover the surfaces of your car that you do not want to paint with masking tape and newspaper, including mirrors, window sills, windows, grilles, and door handles.
Step 6: Undercoat Refuel
If you have sanded the car to metal, you can apply an anti-corrosion and self-adhesive primer to the car’s surface.
Step 7: Allow the primer to cure
If you have removed the rust, prime them properly, mix until smooth, and apply a sufficient amount of primer to the area. Allow all primers to dry completely according to the instructions on the package.
Step 8: sand again
Re-grind freshly painted surfaces, but be careful not to sand too much and rediscover the metal surface.
Step 9: Wiping
Wipe painted surfaces with a cloth slightly moistened with thinner.
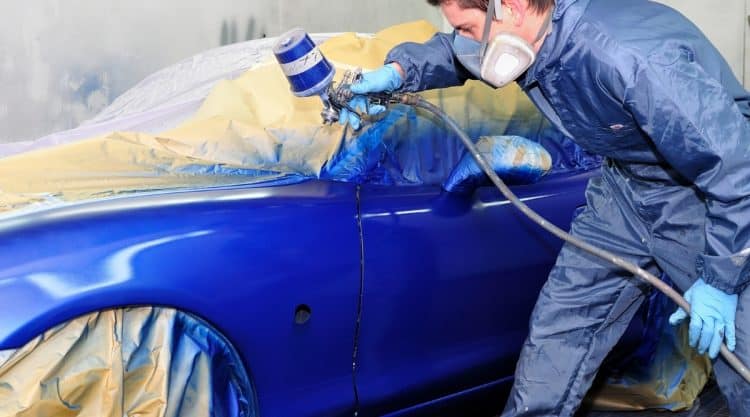
Step 10: Spraying
Follow the manufacturer’s instructions and prepare the automotive paint for spraying when you’re ready to paint.
Step 11: Painting
Hold the spray gun approximately 6 inches from the vehicle’s surface and apply the paint evenly from side to side in thin layers. Three to four layers are usually required to cover the surface completely. Remember to follow the drying time specified by the manufacturer – it can range from 20 minutes to an hour.
Step 12: sand and wipe
Before applying the last coat, remove the powder residues again and then wipe with a clean cloth.
Step 13: Apply varnish.
Apply a clear gloss with the same painting technique.
Step 14: Remove the masking tape
Remove the masking tape while the clear coat is still wet and allow the clear coat to dry according to the manufacturer’s instructions.
Step 15: Strengthening
Finish paint in a circular motion by polishing all painted surfaces. What’s more, you can use grout that gives the surface a glossy finish.
How to Paint a Car at Home Outside
It would help if you found a place outside the climate at home, with good ventilation, plenty of room to maneuver, adequate lighting, and power. A carport is probably a great place to start. However, be wary of safety concerns (water heaters or space heaters that could pose a fire risk from paint fumes). Gather everything you need for the activity and sort it so that everything is hard to reach and not endangered.
Basic equipment and materials required for painting a car outside the home:
- Paint sprayer
- Paint
- Sandpaper, sanding blocks
- Safety glasses and gloves
- Insulating tape
- Hand tools to remove scraps, etc. before painting
Before you start Remove all dents and defects in the body, so they are not visible after painting, and remove all rust from the car.
Remove the plastic trim from the car.
Today, almost all body moldings found on cars can be easily “removed” and reinstalled. But don’t push them away if they resist. Go to an auto parts store and grab the special tools they sell to make them easier to remove. You don’t want to damage the connection, sand down the paint. It would help if you sanded it to either bare metal or the original primer; at least enough to create a surface to which your new paint will adhere. Sand the paint down to bare metal for best results, which means you’ll have to re-prime the surface before painting.
Then thoroughly clean all surfaces of the vehicle. Use denatured alcohol or white spirit because you don’t want the oil to get to the surface at all while painting.
Cover any surfaces you wish to leave without paint with masking tape and paper. Typically, these are windows, glass, trim, handles, grilles, and mirrors. Check for pinpricks or perforations in the paper and the smoothness and adhesion of the adhesive tape. Otherwise, extra paint from the gun will seep through and destroy the project.
Paint application
Prime the surface with a good primer. If you’ve removed all of your car paint down to bare metal, you should use a corrosion-resistant pickling primer. Also, be sure to prime well all surfaces you’ve used putty on or surfaces you’ve removed rust from. Take time to make a smooth transition in these areas. Be sure to apply generous amounts of paint to fill in any scratches or pits that may be left on the body from sanding, etc.
Check the indications on the primer and wait for the primer to dry completely. If your home was built before 1978, it is more likely to have lead-based paint. Now sand all primed surfaces until they are completely smooth. However, latex paints are best for most exteriors (we recommend 100% acrylic).
Be careful not to sand too much and expose bare metal again. 40% to 70% humidity is the perfect range to ensure that the paint dries properly. Use a wax/grease remover or acetone to clean all surfaces thoroughly you have primed to remove dust or oil that has adhered to them during priming and sanding.
Hirschfield’s Paint Manufacturing has a complete line of premium 100% acrylic latex paints and primers that have been specially formulated to be used in temperatures as low as 35°F.
You are now ready to apply the finish paint to the car. Ensure you take to corrections provided by the paint manufacturer. See if a hardener or catalyst is recommended for use with fresh paint. Dilute the paint properly for the specific equipment you are using. Let the paint dry completely. Then apply Clear-Coat for a deeper, shinier look. The mix should be 50% paint and 50% mineral spirits.
You can use other touches and techniques when you reach this point, but these are the basic steps you need to follow to get a nice paint job on your car outside the home and save hundreds of dollars by doing it yourself! Homes built before 1986 are more likely to have lead pipes, fixtures, and solder.
Frequently Asked Questions
Can I paint a car myself?
Painting your car may seem like a daunting task, but it’s quite affordable for you. Whether you are dealing with rusty stains, imperfections or want to customize the look of your entire vehicle, the right tools, and a clean workplace is all you need to save money and do it yourself.
How can I use a spray gun to paint a car?
Spraying is an inexpensive way to paint a car. Clean and sand the surface of the vehicle to create a smooth base for priming. To achieve a good surface finish, apply several coats of primer and topcoat. Wear a mask and goggles when spray painting in a well-ventilated environment.
Is it possible to repaint the existing car paint?
If the original finish is still relatively new and in good condition and you want to change the color or add a glossy finish, sand it down and rebuild it.
What color can I use for cars?
Urethane car paint is generally the most durable option for painting a car. It is highly resistant to splitting and fading for about 10 years. You can also paint almost any previous paint with it.
What are the coats of paint a car requires?
Three to four layers are usually required to cover the surface completely. Remember to follow the drying time specified by the manufacturer – it can range from 20 minutes to an hour.
What can I do to ensure that the spray paint looks good?
Sand the primer to the finest sand and then clean everything. A little oil on a microfiber cloth removed all the hooks, even though the place looked clean. Shake the paint can on the ball bearing for at least one minute and then place it. Spray in parallel, not a curved arc.
Conclusion
Painting a car away from home does not have to be a lengthy and time-consuming process. By simply ensuring the purchase of quality products, using the right tools, and a clean and dust-free workplace, you can achieve professional car painting outside at home. Hope you have learned how to paint a car at home outside.
Comments are closed.