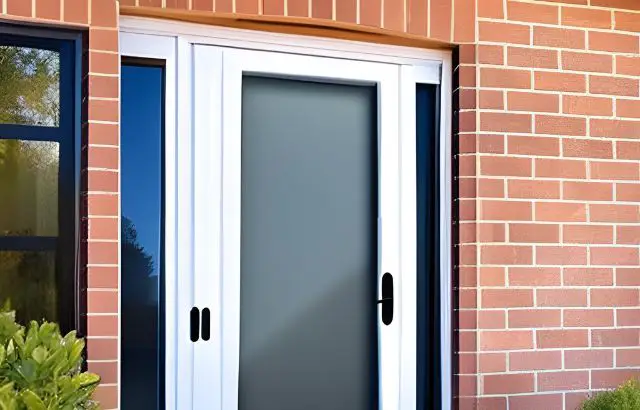
Painting a security screen door can be a great way to refresh the look of your home and add a unique pop of color to it. You can achieve this task relatively cheaply with a few simple supplies.
The best part is that painting your security screen door is an easy do-it-yourself project that can be completed in a few hours.
This blog post will walk you through how to paint a security screen door:
- Gather the necessary supplies
- Prepare the Door for Painting
- Choose the Right Paint
- Clean the Door Thoroughly
- Apply Primer to the Door
- Sand the Door Smoothly
- Apply the Paint in Even Coats
- Let the Paint Dry
- Apply a Final Coat of Paint
- Let the Door Cure
- Reinstall the Door
We will provide helpful tips and techniques to properly paint the door and advise on selecting the right supplies and tools.
By the end of the blog post, you will have all the information you need to successfully and confidently paint your security screen door.
How To Paint A Security Screen Door
1. Gather the necessary supplies
Painting a security screen door is simple, but it requires the right supplies to ensure the job is do properly.

The necessary supplies include a primer and paint specifically designed for metal surfaces, a paintbrush, a roller and tray, a wire brush, painter’s tape, sandpaper, and a bucket of warm soapy water.
Additionally, you may need to purchase a new door handle and latch to replace the existing hardware. Before you can begin painting, ensure you have all the necessary supplies.
2. Prepare the Door for Painting
The first step to painting a security screen door is to prepare the door for painting. Begin by cleaning the door with mild detergent and warm water.

It will remove any dirt or debris that may interfere with the paint’s adherence. Once the door is clean, sand it lightly with a fine-grit sandpaper.
This step will create a smooth surface for the paint and ensure a more even finish.
After sanding the door, wipe it down with a damp cloth to remove any remaining dust. The door is now ready for painting.
3. Choose the Right Paint
When painting a security screen door, choosing paint is as important as the preparation and application process.
Since the door is exposed to the elements, you want to make sure that you use high-quality, weather-resistant paint.

Additionally, you want to choose a color that enhances the look of your home’s exterior.
Look for paints labeled “exterior” or “vinyl-safe” to ensure the paint won’t fade or peel over time.
4. Clean the Door Thoroughly To Paint a Security Screen Door

Before you begin painting your security screen door, it is essential to clean it thoroughly.
It can be used as a pressure washer or a damp cloth with mild detergent.
If using a pressure washer, maintain a distance of at least 8 inches to avoid damaging the door.
Once the door is clean, use a brush or a lint-free cloth to remove all dirt and dust particles, and ensure the surface is completely dry before you start painting.
5. Apply primer to the door
Once you have prepped the door, you are ready to apply the primer. Apply a thin, even coat of primer on the door, ensuring the primer does spread evenly.
Pay special attention to the edges and corners of the door since these are prone to peeling and flaking.

Allow the primer to dry completely before applying the next coat. If necessary, apply a second coat of primer to ensure a smooth, even finish to your security screen door.
6. Sand the Door Smoothly
The sixth step in painting a security screen door is to sand the door smoothly.
It is important to take the time to sand the door with medium-grit sandpaper until the surface is uniform and relatively smooth.

Create a surface ready to accept the primer and paint you will use to give the door a finished look.
It is also important to wipe away any sanding dust with a damp cloth before you apply the primer.
7. Apply the Paint in Even Coats
Once you have sanded and primed the security screen door, it is time to apply the paint.
Use a brush or roller to apply the paint in even coats, covering all surfaces.
Start near the door frame and work your way out in even strokes. Allow the first coat to dry completely before applying a second coat.

Take your time and patience—a stunning finish requires multiple coats.
Avoid brushing too hard or too quickly, as this can result in an uneven or splotchy finish.
Once the last coat is applied, allow the paint to dry for at least 24 hours before reinstalling the door.
8. Let the Paint Dry
Once you have finished painting the security screen door, allowing the paint to dry completely before applying any other coats is important.
Dry each coat for at least 2-3 hours to ensure maximum adherence before applying any additional coats.

If the paint is not given enough time to dry, the paint will not adhere to the surface properly, resulting in a poor-quality job.
Check the paint manufacturer’s instructions for recommended drying times before painting.
9. Apply a Final Coat of Paint
Once your security screen door is prepped, you can apply the final coat of paint. Select the appropriate paint for the material of the door. If there is a factory finish, use the same paint or one that works with the current finish.

After stirring the paint, pour it into a paint tray and use a quality brush or roller to apply a thin, even coat to the areas of the door that need to be painted. Allow the paint to dry completely between coats, and apply at least two coats. Once the final coat of paint is dry, your security screen door is ready to be installed.
10. Let the Door Cure
The final step in painting a security screen door is to let the door cure.
After the paint has dried to the touch, it is important to allow the door to be curing before opening and closing it. This step is essential to ensure the paint will last and not chip or peel over time.

Curing usually takes 24 to 48 hours and can be done by leaving the door open and allowing air to circulate it.
Once the curing process is completed, your security screen door should be ready to use!
11. Reinstall the Door
The reinstallation of a door to paint a security screen door requires careful consideration to ensure the job is done correctly.
After removing the door, it is important to properly measure the opening and note any additional hardware that may need to be purchased to fit the door. Additionally, any trim pieces should be removed to prevent painting interference.
Once the door is reinstalled, a primer coat should be applied to provide an even surface to help the paint adhere better.

After the primer has dried, the security screen door can be painted in the desired color.
Finally, the trim pieces can be reinstalled, and the door can hang in its original location.
With careful planning and attention to detail, reinstalling a door to paint a security screen door can provide a great sense of security for any home.
My Opinion
In conclusion, painting a security screen door is an easy and inexpensive way to give your home a fresh look. By taking the time to properly prepare the door, choose the right type of paint, and apply the paint correctly, you can create a high-quality look that will last for years to come.
With patience and attention to detail, you can transform your security screen door into a beautiful work of art. Painting a security screen door is a great way to update the look of your home.
Not only will it make your home more attractive, but it will also help protect it from intruders. It’s easy to paint a security screen door with the right tools and supplies.
Remember to use a high-quality primer and paint to ensure the best results, and have patience while the paint dries. You can update your home with a beautiful, new security screen door with a little effort.


