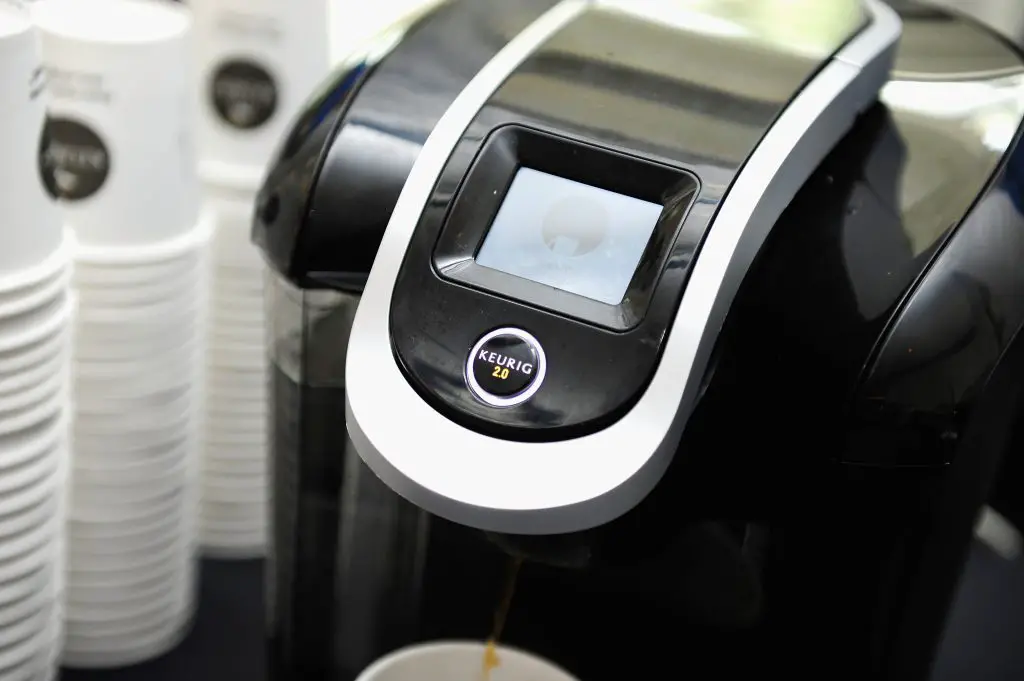
Keurig coffee makers have revolutionized the way we brew our morning cup of joe. With their convenience and variety of flavors, it’s no wonder they’ve become a staple in many households. However, like any electronic appliance, Keurig machines can encounter issues that require a reset. In this step-by-step guide, I will walk you through the process of How to reset the Keurig coffee maker, ensuring it functions optimally and delivers that perfect cup of coffee every time.
Understanding the Reset Process
Resetting your Keurig coffee maker can help resolve various issues, such as clogged needles, erratic brewing, or error messages. It essentially restores the machine to its default settings, eliminating any temporary glitches or malfunctions. Before diving into the reset process, make sure you have the necessary tools and materials on hand, such as a clean cloth, a mild detergent, and a paper clip. Now, let’s get started!
How to Reset Your Keurig Coffee Maker
Step 1: Powering Off and Unplugging Your Keurig Coffee Maker
The first step in resetting your Keurig coffee maker is to power it off and unplug it from the electrical outlet. This ensures your safety and prevents any potential damage to the machine during the reset process. Wait for a few minutes to allow the machine to cool down before moving on to the next step.
Step 2: Disassembling the Machine
To access the internal components of your Keurig coffee maker, you’ll need to disassemble certain parts. Start by removing the water reservoir, which is usually located at the back of the machine. Empty any remaining water and set the reservoir aside. Next, remove the drip tray and the K-Cup holder, which are usually located at the front of the machine. These parts can be easily detached by gently pulling them out.
Once you’ve removed these components, take a clean cloth and dampen it with water and a mild detergent. Wipe down the exterior of the machine to remove any dirt or residue that may have accumulated over time. This will ensure a thorough reset and improve the overall performance of your Keurig coffee maker.
Step 3: Cleaning the Water Reservoir and Other Parts
Now that you’ve disassembled the machine, it’s time to clean the different parts of your Keurig coffee maker. Start by cleaning the water reservoir, as this is where the water for brewing your coffee is stored. Rinse the reservoir with warm water and a mild detergent to remove any mineral deposits or residue. Be sure to scrub the inside of the reservoir with a soft brush to ensure a thorough clean.
Next, move on to cleaning the K-Cup holder. This is where you insert the coffee pods for brewing. Using a paperclip, carefully remove any clogs or debris that may have accumulated in the needles of the K-Cup holder. This step is crucial, as clogged needles can prevent your Keurig coffee maker from brewing properly.
Step 4: Reassembling the Machine
Once you’ve cleaned all the necessary parts, it’s time to reassemble your Keurig coffee maker. Start by placing the cleaned water reservoir back into its designated spot at the back of the machine. Make sure it is securely attached and properly aligned. Next, insert the drip tray and the K-Cup holder back into their respective positions at the front of the machine. Ensure they are firmly in place before moving on to the next step.
Step 5: Powering On and Testing Your Keurig Coffee Maker
Now that your Keurig coffee maker is reassembled, it’s time to power it on and test its functionality. Plug the machine back into the electrical outlet and turn it on. Wait for the machine to warm up, which usually takes a few minutes. Once it’s ready, run a brewing cycle without inserting a coffee pod. This helps flush out any remaining cleaning solution or debris from the reset process.
Once the brewing cycle is complete, your Keurig coffee maker should be reset and ready to brew your favorite cup of coffee. If you encounter any issues or error messages during this process, consult the user manual or contact Keurig customer support for further assistance.
Additional Tips for Maintaining Your Keurig Coffee Maker
To ensure your Keurig coffee maker continues to function optimally, here are some additional tips for its regular maintenance:
- Descale your machine regularly to remove mineral buildup. Follow the manufacturer’s instructions on how to descale your specific model.
- Use filtered or bottled water to minimize mineral deposits and extend the lifespan of your Keurig coffee maker.
- Clean the external parts of your machine regularly to prevent dirt or residue from affecting its performance.
- Replace the water filter, if applicable, according to the manufacturer’s recommendations.
By following these maintenance tips, you can enjoy a fresh and flavorful cup of coffee from your Keurig coffee maker for years to come.
My Opinion
Resetting your Keurig coffee maker is a simple yet effective way to resolve common issues and keep your machine in top-notch condition. By following the step-by-step guide provided in this article, you can reset your Keurig coffee maker with ease and enjoy a perfect cup of coffee every time. Remember to also implement regular maintenance practices to prolong the lifespan of your machine and ensure its optimal performance. So, go ahead, reset your Keurig coffee maker, and savor your favorite cup of java!


