This article’s primary objective is to educate us on how to compact pavers without a plate compactor, lay paving stones, put pavers on your patio, compact soil, and other relevant topics discussed in the articles.
What is a Plate Compactor?
Soil is compacted by plate compactors using a sizeable vibrating plate, typically made of steel. The force compresses the ground, and the vibration further compacts it, causing the grains to move closer together and squish any remaining air pockets. People use Plate compactors in construction to compress the ground and create a flat, even surface.
It is a heavy steel plate attached to the bottom of a hybrid riding/pushes lawnmower-like machine. In preparation for paving, landscaping, or other work, a plate compactor will either vibrate or pound the soil beneath the plate to level it.
You can repair driveways and parking lots using a plate compactor with asphalt or a sub-base.
How to Compact Pavers without a Plate Compactor
Step 1: Wear protective clothing

Before starting work, you should put on the correct protective clothing. Appropriate protective equipment is important when handling a vibrator without a plate compactor. Please take note of the following guidelines:
- Do not wear baggy, loose-fitting clothing, a tie, or loose jewelry when compacting the soil.
- Tie long hair back.
- Wear sturdy, long trousers because the hot exhaust gases can burn your legs.
- Put on protective gloves, protective goggles, and hearing protection.
- Remember that the machine gets hot during operation. Do not reach into the motor area if the device has not yet cooled down completely.
Step 2: Prepare the substrate.
Check the underground in the pit carefully. The soil must be so smooth that water cannot collect in puddles when it rains. Also, the land must be strong and stable. If this is not a problem, you must compact natural land. To do this, lift the vibrator into the pit. Always make sure you have a secure footing when starting and while working. If the ground is very soft or uneven, reduce the engine output as much as possible.

This prevents the device from sinking into the ground or from being difficult to control while you are working. Run the device evenly over the entire surface. If you work on areas that are higher than the surrounding soil, compact the interior first. Finally, compact the last 30 to 40 cm in the edge area.
Step 3: Create a layer of frost protection.
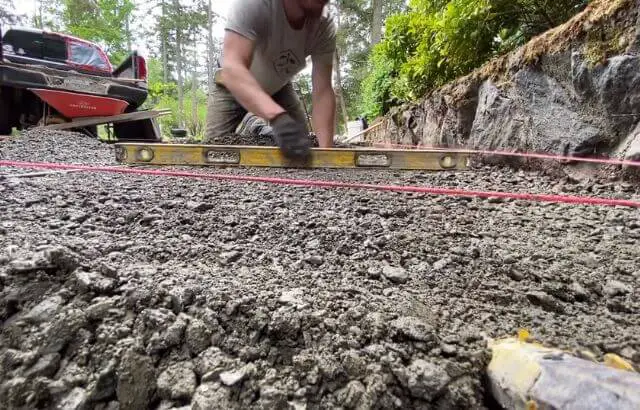
Now distribute the coarse crushed stone or gravel on the ground. Peel off the surface with a board and create the necessary slope directly. A spirit level acts as a measuring tool for good service. Gravel is suitable for less polluted areas such as terraces or paths in the garden.
In the driveway or the area of parking spaces, you use gravel because it is much more stable. The frost protection layer should be at least 10 cm thick. Make sure that the subsurface does not become too dense. It should be firm and stable but allow the water to drain away as drainage.
Step 4: Build the base course.

After you have sufficiently compacted the soil with the frost protection layer, you now build the actual base layer. It also consists of crushed stone or gravel, but use a finer grain size here. The base layer should be at least 13 cm thick. Apply the material also, moist and distribute it. Again, straighten it with a board and pay attention to the slope.
Step 5: Apply a layer of sand.

In the last step, apply a 5 to 8-cm thick layer of sand. You do not have to compact this layer with the machine. It is sufficient to distribute the sand evenly and remove it with the necessary slope. You can see patio stones or decking embarrassed wood on the sand. Note that you must compact the subsoil for a terrace at least three times. If the soil is more heavily loaded, the subsoil must be more compacted to prevent the soil from sinking.
Step 6: Clean the vibrating plate

After work, the work equipment needs to be looked after. Clean the case and the air filter of the machine. If it is not needed for a long time, some care and maintenance work should be carried out. Drain the fuel and collect it clean in the appropriate container. Remove the spark plug and add a few drops of engine oil to the cylinder. Pull the starter cable several times to distribute oil on the machine.
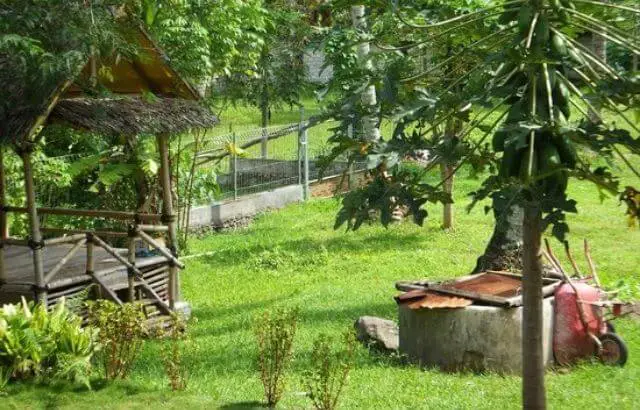
How to Lay Paving Stones
Laying paving stones in your garden or on a path yourself is not that difficult. Carefully follow the steps below and turn your patio into a fantastic relaxing spot in less time than it takes to say it.
Step 1: Choose the right pavers.
You have chosen your favorite pavers in the store. That’s a good thing done! But know that two stones are never the same. So have all of your pavers delivered in one order, and then take your pavers from different palettes to obtain a harmonious blend of shades.

Step 2: Place the counter-ridging of your pavers
By first installing the counter-ridging, you prevent your pavers from slipping. Opt for a wide or deep back-ridging and always plan -a thin concrete pad (150 to 200 kg of cement / m3 = 1 part of cement for 5 to 7 parts of sand). Temporarily lay a row of pavers between the stops to determine the exact distance.

Step 3: Lay the foundations for your pavers.
Always make sure to lay your pavers on draining soil. Stabilize it using a stabilized bed of sand obtained by mixing pure washed river sand (0 / 2-0 / 5 mm) with a maximum of 150 kg of cement per cubic meter (1 part of cement for 7 parts sand). This mixture should be spread evenly with a thickness of 15 cm within 3 hours. Avoid imperfections by quickly brushing the stabilized laying bed to achieve a consistent surface. Did you have to dig deep? Then use crushed gravel to compensate for the difference in level.
Plan for an overcoat of 15% and compact well to prevent the laying layer from running off. Make sure that the top surface of the foundation has a slope of 1% toward the street so that rainwater does not run off toward the house.

Step 4: Place the laying layer and the pavers
Prepare a laying layer with the same mixture as the foundations and spread it to obtain a uniform thickness of 4 cm (3 cm after compaction). This laying layer eliminates small differences in thickness between the pavers and therefore does not have to be compacted immediately. Compaction occurs only after the pavers have been laid at the time of settlement.
Place the pavers on the laying layer against each other, providing a small joint. Avoid puddles of water on the pavement by laying the pavers with an inclination of 1 to 2 cm per meter. Also, ensure that the pavers are a few inches above the level of the beds.

Step 5: Grout and tamp the pavers.
Brush the pavers with fine white sand and clean the surface. Also, clean the vibrating plate thoroughly before starting to tamp. Start from the edges and progress gradually towards the middle.

Tips for Compacting Soil
Adequate compaction of the sub-foundation and foundation is the key to success for any development project. This newsletter from our Technical Support Manager, Mike Huber, explains five tips for complying with your sub-foundation or natural soil.

Know how to recognize your natural soil
Before starting your project, identify the type of soil you will be working on. Make sure that the ground can support the weight overload, whether for a pedestrian or vehicular application. Highly organic soils should be removed, and clay soils removed or amended.
Amend (if necessary)
- Amendment of clay soil can be done with:
- Portland cement
- Medium caliber stone compacted in clay
- A combination of both
Check the hydraulic and hydrostatic content
The granular soil should have a certain degree of moisture to obtain good compaction. The degree of humidity will lubricate the particles and help them settle.
Use the correct compaction equipment.
First, ensure you have enough equipment for your project, and then make sure you use the correct compactor. A vibrating plate is suitable for granular soils, but a (Jumping Jack) or (Sheep roller) is required for clay soils. Natural soil should be compacted to 98% of the Proctor.
Do not reuse excavated soil.
It is important to never put soil excavated from the site into a hole to fill it. Because when the soil is excavated, its volume multiplies by 20 to 30% and is normally unusable, and its initial density is now altered.
Frequently Asked Questions
What can I use instead of a compactor?
A standard sledgehammer is the best tool for manual tamping. Vertical motion repeated lifting and lowering. You can do it manually if you don’t want to rent a powered plate compactor, but it will take a long time. Compacting the soil around fixed objects such as fence posts is possible using iron digging bars.
Additionally, polymeric sand and general-purpose sand can be utilized. They are planted firmly on the cobblestones.
Can you pave without a compactor?
Start using a rubber mallet on the perimeter of your designated work area and move inward. When compacting newly-laid pavers, begin on the edge and work inward. Avoid puddles if you do not wish to drown. Allow for a small gap between pavers.
In addition, a hand tamper is only one of many available tamping tools. The handle’s flat surface is handy when pressing down on the gravel. Gravel is more complicated to compact than soil; therefore, you can use a machine-operated tamper, such as rollers or a powered plate compactor, to compact it.
What can you use instead of a Wacker plate?
A small wacker plate would be ideal for compacting it, but a hand will suffice if you don’t mind developing Popeye arms. You may also employ the following:
Compactor for plates with a conveyor. Using friction and gravity, a plate compactor can reduce the volume of materials such as soil and gravel to more manageable proportions. Also:
- Compressor for combating rams on Shackles (Vibrating Plate).
- Roller/Compactor for Use in the Trench.
- Rammer.
Can you hand tamp pavers?
Manual tampers are capable of compacting and leveling surfaces. It is beneficial for compacting loose soil, repairing asphalt, leveling gravel, and compacting gravel. Even pavers can compress themselves using a hand tamper.
Unless you intend to remove all the pavers in five to ten years and re-level the base because it has become uneven, using a hand tamper or flat plate, you should compact the soil as much as possible.
How much will pavers sink when compacted?
When compacted, soil contracts by 30%. Backfilling with soil will result in a 30% settlement. Even if you backfill with 10 inches of dirt, your pavers will settle by about 3 inches over time, causing complications. In contrast, a well-laid gravel base can completely prevent settling. This depends on the thickness of your bedding. This coating has an inch-thick maximum thickness.
Can you put too much sand under the pavers?
The amount of sand you use will determine the success or failure of your paver installation, so adhere to the recommended 1 inch.
Here are several explanations: A patio installation may be hampered by waves caused by an excessively thick sand layer. When you press pavers into a wide sand bed, misalignment and a sloppy appearance may result.
After rough leveling and wetting, the subbase should be firmly compacted by hand or with a machine.
Do you tamp sand for pavers?
Ensure that the sub-base is 50 mm thick and devoid of roots and debris. Before firmly compacting the subbase by hand or with a machine, it must be roughly leveled and moistened. Typically, hand compaction is sufficient when laying pavers at home.
With a plate tamper, you can compact the bedding sand around the pavers and vibrate the jointing material into the crevices.
Will pavers sink in the sand?
To prevent shifting, you can sink pavers into a 1-inch bed of level sand. The plate compactor presses paving stones into sand. Sand alone will not keep pavers in place and will not keep them from shifting and sinking for as long as you require.
How thick should the sand be under the pavers?
The sand between the pavers enables them to move and adjust without difficulty. The final recommended sand depth for pavers is 1 inch, including sand seeping through joints and into the paver base. In your calculations, employ a 2-inch sand depth (0.1667 m).
When installing pavers, using no more than the recommended 1 inch of sand is essential, as using more can lead to shifting and other problems. It will cause waves if you use too much sand to construct your patio. When pressing pavers into a thick bed of sand, they may become misaligned and disorganized.
Expert Opinion
We trust you have taken in a great deal concerning this article on the best way to compact pavers without a plate compactor, compacting soil, laying polymeric sand, putting pavers on the patio, and other relevant subtopics discussed in the content of the article.
Read More: How to Lay Bluestone Pavers