Well! If you live in a home with vinyl siding and want the siding to look smooth and shiny, you should replace some of J channels’ sidings. These channels are the essential piece of trim work. If you notice that the existing J channels are getting damaged or broken, fix them in the first place. For that matter, you need to know how to install j channel in the existing siding? In this topic, you will learn the easiest way to install a J Channels.
Yes! Installing J channels under the existing siding is a comparatively simple and easy process. Usually, the first step is to install J channels and then the vinyl siding. There may be several reasons why you need to install new J channels around doors and existing sidings.
You have two options for installing vinyl siding and J channels underneath the existing siding:
- You can either cut the J- Channel’s punctured edge or set it into the place along with the doors, windows, corners, and edges of the wall by securing them with screws and nails.
- Or replacing the siding to install a new fit.
Let’s look at the complete process involved in installing vinyl siding and j –channels around the window frame before and after the vinyl siding is there in place. So in this discussion, we will discuss the whole process in detail about how to install the J channel under the existing siding.
What is J-Channel?
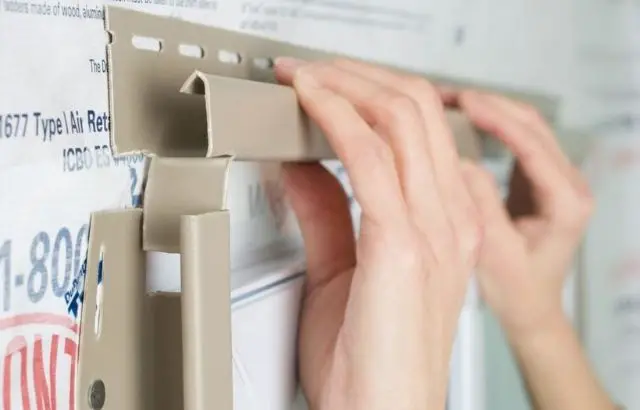
- As I mentioned previously, the J- Channel is an essential part of your charming homes’ vinyl siding. It permits you to do sleek work like the professionals and experts and give your vinyl siding a smooth and elegant look.
- J-Channel tricks are easy to understand and are easy to fit indoors, walls, frames of the windows and inside the corners where the siding meets on the roof’s point.
- Significantly, it would help if you fixed the J-Channels at the existing siding conjunction, wherever at the meeting point of these sidings. These specific places help to cover up the catted pieces and to get a smooth look. Instead, you may notice the uneven look; J- Channels gives the even, soft and elegant look you want to be in your existing sidings. It can also be done afterward, but your priority should be to install the J- channels before mounting the vinyl siding.
How to Install J Channel under Existing Siding
You may choose between the two approaches depending on if you really need to put new J-Channels or place them in the current vinyl siding. To secure the J Channels beneath the siding, you may simply repair the affected portion of siding. Alternatively, you can cut the J- Channels’ pierced edges and fasten them to the siding’s junction with corners for doors, walls, and windows. Then, pins and nails are used to secure them.
The detail of these two methods is given below.
Install a J-Channel by removing the Vinyl Siding:
Temporarily if you want to remove the siding and install the J-Channel, you should have the zip tool, hammer, flat bar, nails, and J-Channel.
- Mark the areas with a marker where you want to install the J-Channel and decide which pieces of siding you will need to tweak back to get the job done.
- With the help of a zip tool, nail it into the siding drum edge you want to remove. This step might be difficult if the siding is tight, but you can quickly look for the loose piece.
- When you see that the zip tools are set in place, push the siding downward. Move the zip tool lengthwise on the siding to the description of the nailing hem under the siding.
- With the flat bar, slice it between the nail heads and siding.
- Removal of nails should be done that are holding the siding very carefully.
- To remove the siding strips, completely slide them in a downward direction. Alternatively, you can try to install J-Channel by pushing the pieces of siding in a backward direction.
- Install the cut pieces of J-Channels to fit correctly against the doors, walls, and windows.
- Hammer the nails in the J-Channels, at the punctured holes to make it in place.
- Now remount the siding that was replaced entirely or pulled away.
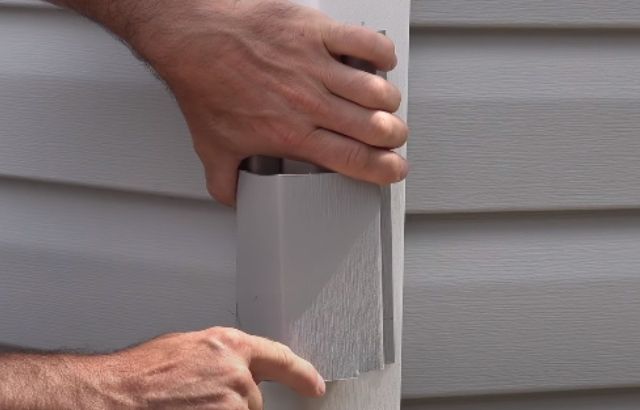
Install J-Channel by trimming punctured edge in the existing siding.
This method of installing J-Channel is best for the places where the existing vinyl siding you want to make has been damaged or broken, and you want to cover by simple means.
It only requires trimming the old J-Channel, cutting off the new ones’ punctured edges, and placing it over the top edge.
- If you have the damaged J-Channel in the existing siding, begin it with the removal of silicon from the space that holds it in that place. For this, you should do it with the utility knife very quickly.
- Cutting of the broken J-Channel should be as short as possible along lengthwise to be hidden underneath the new piece very effectively.
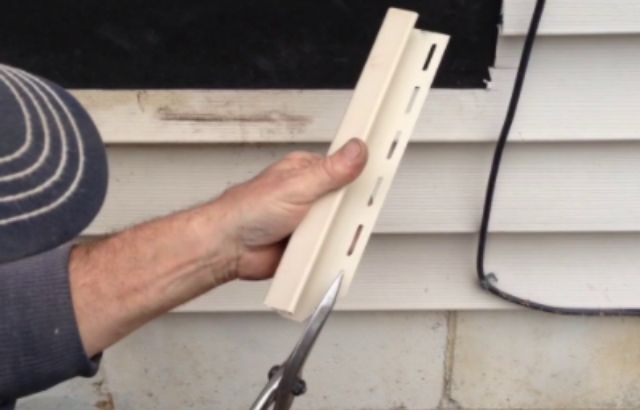
- For the next step, you should opt for the new piece of J-Channel, and cut the punctured edge, and this piece will not be essential for this purpose especially.
- Measure the J-Channel lengthwise that you need. You will need heavy scissors or a saw for cutting Channel lengthwise if necessary.
- If you notice the apparent gap in silicon and the J-Channel, cut it properly. Slide the piece into the hole over the old one, damaged J-Channel.
- To tight it in place, use the silicon in the nails, screws, and the gap under the J-Channel. I suggest you the same process if you want to install J-Channel around windows to get a better result.
That’s all about how to install J-Channel in the existing siding. Only you have to get some proper knowledge and a little amount of tolerance. You can successfully mount the J-Chanel under the existing siding by completely removing it or pulling it back.
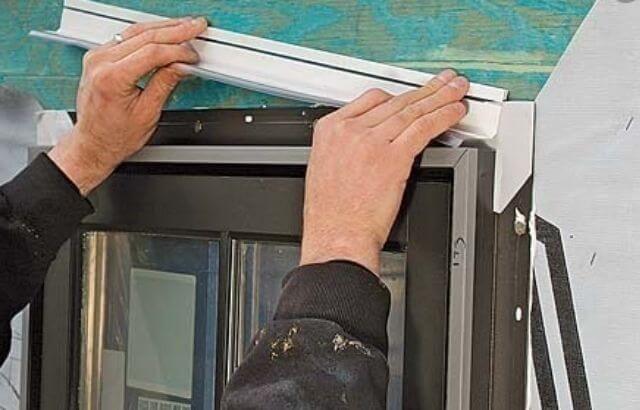
Measurement of J-Channel:
- It is essential to take the measurement of the J-Channel very carefully and accurately to ensure its proper installation. Take the measures around the doors, windows, and corners with extra care, where you want to install the J-Channel.
- Yes! You should measure it outside from the existing trim. The Channel must have enough space for the contraction and expansion of the siding to respond to the weather changes.
- As you ensure the best results, the siding length should be shorter in places where you want to install J-Channel.
- In installing J-Channel in existing siding, cut the sides slightly to recompense the weather changes. However, cutting of the siding should not be too short so as to avoid falling off the Channel.
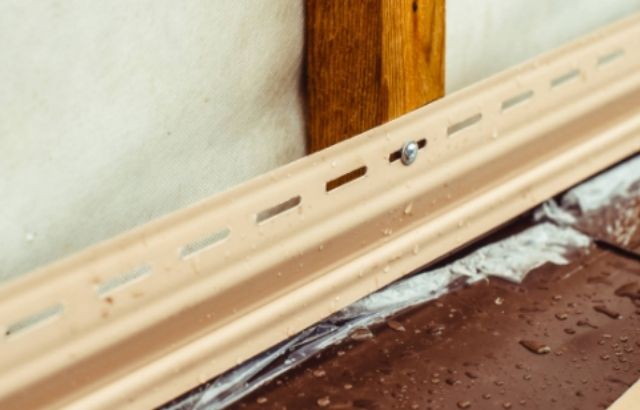
Avoid the J-Channel moisture.
When you finally plan J-Channel’s installation, cut it at the 45-degree angle and cut it from the top so that the water will blush out from the Channel; instead, it should not be trapped inside.
Moreover, this will stop the tremendous water damage caused by the moisture, which can enter under the vinyl siding. Most of the J-Channel manufacturers offer a small perforation in the channels to avoid the risk of entering moister in them.
Products at Amazon .com:
- LED wholesalers Aluminium Channel.
- J -Channel Cable Raceway with 5 M.
- Crescent Wiss 11 Snap Lock Punch.
- Red Devil 0532 Pre Mixed Vinyl.
- Pelle Patch- Leather Vinyl Adhesive.
How to Install J Channel under Existing Siding: FAQs
How do you join J Channel siding?
To join the J-Channel siding, cut the one section of the nailing projection. Now mount the inverted J-Channel on the top of the wall, underneath the eave. For this purpose, you should leave a gap of1/4 inch between the J- Channel and the counter posts. Now overlap the J-Channel to ¾ inch for expansion.
Can you install siding over old siding?
Yes, we can install the siding over the existing siding. According to the best suggestions given by James Hardie, the current or old siding can be used as a substitute if it is in good condition.
Is it possible to change windows without taking off the siding?
Yes! If the framework and sill are in excellent shape, free of humidity and mildew, you may simply replace the doors without doing external renovation. This is because it is possible to change windows without removing siding. Even though the templating is smaller, it’d be beneficial if one did not stress about the situation.
Conclusion
To conclude this topic, if you have finally decided to install J-Channels under the existing siding, the tips mentioned and the procedures will significantly help you get the job done. You only have to get some crucial points to know and have a little patience; you can quickly finish the task to remodel your homes. So, now forget about calling a professional and enjoy the best siding in your house. All you have to do is track the steps correctly, and the rest will be easy for you. You will save your valuable time and cash, which you will invest in calling for professional, help.
Read More: How to Cover Asbestos Siding

