Repainting and refinishing old, corroded metal is simple. And there are a lot of neglected metal artifacts out there that might get saved with a little paint and a little touch-up. You only need a little elbow grease, sandpaper, and paint for a metal repair job. Many old goods may be made more functional in this way. Thus, we have made this post on How to sand metal for painting. Many other sorts of metal things, such as old toys, patio chairs, desks, and garden seats, may be restored using the procedures detailed here.
Planning is the key to a successful paint job to get a clean and modern finish and sand off old paint and corrosion. Renovating a used metal object saves money to gives numerous old things new life with just a little effort and time. Come along as we highlight this below.
How to Sand Metal for Painting: Essential Equipment
Here are the essential tools before sanding metal for painting is best. They are as follows:
Fabric/sanding paper
As the title indicates, paper is the most popular base layer for grinding tools and comes in various grits. It may be used for all kinds of sanding, from rough to fine. Some sanding papers are intended to be used with sanding machines and have perforations that allow you to suction the sawdust as you work.
Other forms of sanding paper come in sheets that may be used by hand or wrapped around a scrubbing block. Some sanding machines include a cloth base layer that is very resilient and sturdy, making it harder to rip while in operation.
You may distinguish various sanding equipment by examining the grit and base substance. Depending on the ultimate effect you need, you should select a proper mix of sanding tools.
Also, don’t ever use sanding paper that is more than one size larger than what you’ve been using before. For instance, if you start with 80-grit sanding paper, you should never go to 180-grit sandpaper paper to get a smoother surface. Before moving on to a finer grit, it’s best to start with 120-grit sanding paper.
Pad for sanding
If you need to operate on a curved piece of iron, sanding equipment composed of foam, such as sanding pads, is ideal. Your fingers’ pressure is equally dispersed. This prevents severe scratches from appearing on the surface of the substance you’re sanding.
There’s also no danger of sanding too much away. Based on what you’re sanding, multiple grit sizes are available. It’s a good idea to acquire a sanding sponge set if you’re working on anything that needs various grits.
The Primer
Primers are often used as a basic layer for sanding gear that is intended to be operated by hand. It’s perfect for applying to metals before painting. Using primer, you may get rid of the final few little metal fibers before painting your metal.
How to Sand Metal for Painting

Many indoor and outdoor painting tasks use metal parts. Metal outdoor fittings, aluminum guttering, plumbing fittings, galvanized steel cladding, and other materials are all ubiquitous in homes. They also need a new coat of paint now and again when painting metal, proper surface pretreatment makes a lot of difference in the result.
This is in addition to the duration. Even the greatest paints and unique metal finishes will not survive if they are not properly prepared. And all of your efforts will be in vain. Our checklist will assist you in ensuring that your painting job is a success with long-term effects. Please join us.
Here are the steps
- Make sure you’re working in a well-ventilated environment.
- Remove the old paint off the surface using a scraper.
- Wipe the metal’s exterior.
- Prepare the surface by sanding and scraping it.
- Make any necessary surface adjustments.
- Prepare the surface by priming it.
Let’s break down the steps for your better understanding;
Step 1: Make sure you’re working in a well-ventilated environment.
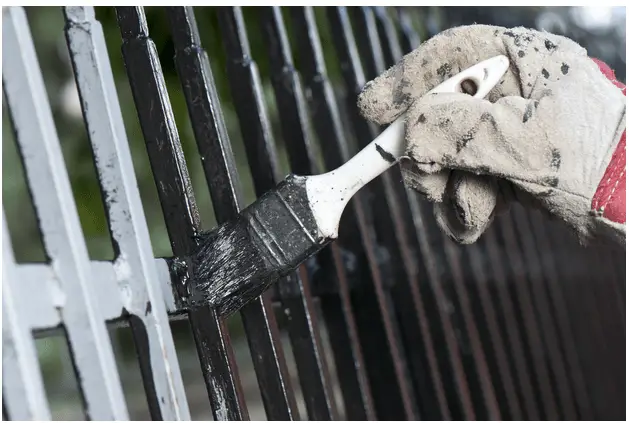
It’s dangerous to work with paint and rust particles. As a result, locate a well-ventilated location where you may lay a drop sheet below your metal project. While working, put on gloves and a dust mask.
While working, have a moist towel handy to wipe away paint, dust, and rust fragments. It is much safer to deal with them now than wait until the end. If there’s a possibility the paint you’re peeling contains lead, putting on a dust mask is a necessity for your protection.
Step 2: Remove the old paint from the surface using a scraper.
Remove the paint off the metal using a wire brush, wiping away dust and paint fragments with a moist towel. Sandpaper may get used to erase the paint if you like.
A combined technique is recommended; removing big areas with a wire brush will go considerably quicker. After that, sand the hiding places using sandpaper.
A wire brush adapter for a cordless drill is also a good alternative. This is also a fantastic option if you need to remove paint from a broad area; try to use safety ear muffs when using drills.
Step 3: Wipe the metal’s exterior.
Wipe away paint dust with a moist towel, and discard the cloth. Remove any residual paint hunks with a scraper. Clean your metal thoroughly with a new cloth, removing any loose paint, dirt, oil, and grime from the exterior.
Do not omit this step, even if the area seems to be clean. You want the metal’s top to be almost clean or as close to it as possible. The inability to correctly clean your metal will result in a poor paint finish. The paint will not adhere correctly to the metal and will readily peel away.
Oils on the exterior of new galvanized iron, which may or may not be apparent to the naked eye, may wreak havoc on your paint job if not cleaned. Wipe down the new galvanized metal with a mild detergent solution.
Step 4: Prepare the surface by sanding and scraping it.
The metal surface will be smoother, more consistent, and simpler to paint after sanding and scrapping. Sand away any accumulated residue that did not eliminate during the cleaning process. Rust must also be scraped away from the source.
Begin by softly sanding and gradually increasing the intensity of your sanding. Scraping will eliminate residual residue, rust from the previous paint job, and any loosened or peeling paint. For this step, avoid using heavy machinery since they may polish the area.
When it comes time to paint, this will cause adhesion issues. If you must sand or scrape with a power tool, be prepared to apply a second layer of priming before repainting.
Step 5: Make any necessary surface adjustments.
Your metal surface might suffer from small openings, dents, and puncture wounds. Cleansing, sanding, or scrapping will most likely reveal these flaws. An epoxy-based compound or epoxy filler may get used to fix most dents.
Bigger holes and gashes will need stronger epoxy filler, maybe in combination with a mesh lining. After any epoxy or filler has been set, the margins of the repair ensure that the future coats are smooth.
Step 6: Prepare the surface by priming it.
The last stage before putting paint on the metal is to apply the right primer. Consider the base and how you want the final varnish to appear and feel. Understand the environment in which your metal surface is located and the elements to which it may be exposed.
All bare iron will need at least one coat of priming. And the more you can define the sort of primer you want, the better the completed product will be.
Resist latex or water-based primers, for instance, if your area will be exposed to wetness. These primers are quickly penetrated by moisture, and your paintwork will need to be repainted in a couple of weeks or months.
Use rust-inhibitive priming, rust convertible, or rust reformers if your surface is prone to rust. We still advocate applying rust-inhibitive primers if your surfaces are comprised of ferrous metal, even if you haven’t experienced any rust difficulties. This is in conjunction with using rust converters on metal substrates exposed to the environment to prevent rust.
A galvanized metal primer is recommended for non-ferrous metals and areas that are not subjected to the weather. This will improve the adhesion of paint coats to metal surfaces.
Frequently Asked Questions
Can I sand metal for painting?
Yes. The above tips on how to sand metal for painting will aid you immensely on this.
Is it possible to repaint a metal without priming it?
Yes. A great paint job starts with good planning. You may get away with mild sanding to scuff up the surface, depending on the model of the metal and the leftover paint. In addition, any peeling paint should get removed. Some spray paints have a primer built-in and may create a good effect.
What does the grit of sanding paper mean?
The coarseness or fineness of a piece of sanding paper is measured in grit. The greater the grit, the sharper the sanding paper will be and the sharper the result. Grit is typically divided into sizes 20 to 30 spots apart.
The texture of sanding paper with a coarse grit is infrequent and widely dispersed. The finished outcome will be rougher. However, a coarse grit allows you to remove more material when sanding.
A finer grit ensures the sanding sandpaper is more evenly distributed, resulting in a cleaner finish. This grit eliminates less material while leaving no major scrapes in the material.
Conclusion
Finally, when metal ages, it might begin to deteriorate fast. Metal may seem aged and antiquated due to rust, corrosion, and discoloration. Fortunately, a fresh coat of paint can turn dingy metal equipment, tool, or furniture into anything shiny and new.
Metal painting is very easy. Now, you have to sand the metal and apply the appropriate paint. The above tips on How to sand metal for painting will be indispensable here.


