The creation of a floor is a delicate operation because it leaves no room for approximation. In addition to supporting its weight, the floor must ensure the occupants’ safety and the furniture. The floor’s installation begins with the joist’s realization, an assembly of pieces of wood called joists. Below, we will guide you on the different steps on how to sister a floor joist.
What is a Floor Joist?
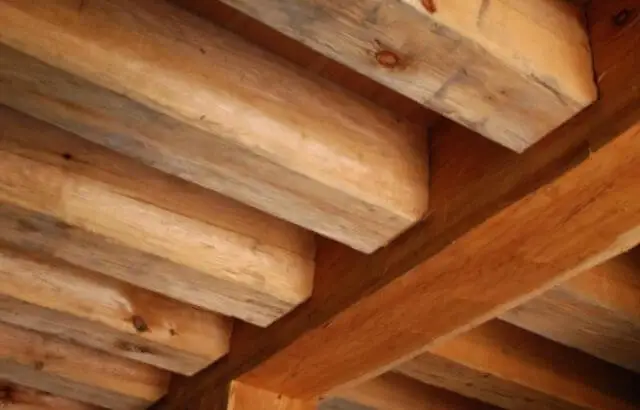
The floor joist is a wood piece similar to a plank that makes up a frame or a floor. You can place this horizontally while resting on walls or beams to support the room’s floor above while ensuring its perfect stability. Usually, you can put joists on the smallest distance, that is, the room’s width and not its length.

Learn More: How To Lay Laminate Flooring In Multiple Rooms
How to Sister a Floor Joist
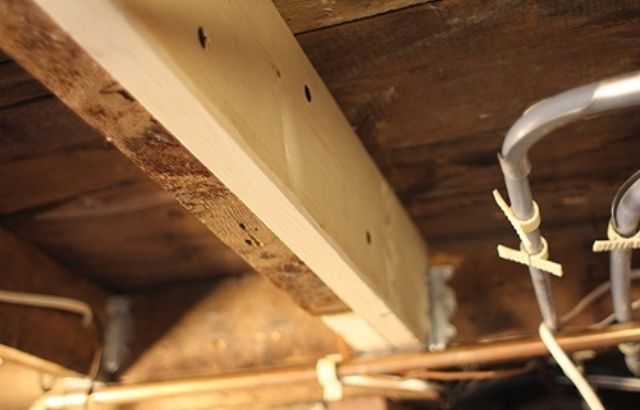
Beams in older houses that have been harmed during the course of the building process are common. There are also planned flooring in some recent houses. One option to strengthen these constructions is to add an additional joist alongside some or all of the current joists. You may call the second joist a sister joist by doing the below actions:
Step 1: Assess your ceiling or floor system. Adding beams adjacent to running joists is a great approach to strengthen damaged sections or reinforce the structure to withstand the increased load if you have weak or broken joists or are adding large weight, such as a hot tub.
Step 2: Plan how you’ll slipped the joist into position. Electrical, water, and heating services can make it difficult to locate the joists. It could be necessary to temporarily shift or eliminate some of these obstructions. By securing them to the existing joist, you may sometimes employ joists that are only a little bit shorter than the complete range.
Step 3: After creating a strategy, buy the necessary supplies. Get really extra to handle unforeseen issues. Keep in mind that sister joists work best when they are safely fastened to the primary joist. Screws and building glue may also be utilized to create a strong connection.
Step 4: Verify the sister joist’s location. Mark the locations of the fasteners and the places where glue is not used while the joist is in place.
Step 5: Drill all holes for fasteners in the sister joists. Once the joists are in place, this will make installing the fasteners much simpler. Use two rows of fasteners, one row for every quarter of the depth of the joist. After that, center the 12 “- 16” fasteners.
Step 6: Cover the joist with construction glue. A reliable, noise-free connection is made possible by the use of screws and construction glue.
step 7: Install the joist in. The two joists may need to be pushed into alignment. Before bringing the screw fasteners home, you may force alignment by driving a 2×4 beneath the joists.
Step 8: At all locations of support, the unit fits tightly beneath the joist of the sister. To achieve a smooth surface, shims must always be used in pairs.
Step 9
Drive all screw fasteners home.
How to Fix a Floor that is giving in Using a Sister Joist
In many cases, a sagging or bent floor results from a beam folded under the floor. You can use a hydraulic jack and install a sister joist to raise the floor and repair any problems caused by the bent beam. A sister joist, as earlier highlighted, is a set of beams that connect to both sides of the floor beam. If you intend to fix a floor that is giving in using a sister joist, do make use of the following steps:
Read More: How To Install Laminate Flooring On Curved Stairs
Step 1
Cut a 10 cm x 10 cm beam to a length that extends from each positioned beam to the damaged beam with a round saw and screw the beam through the existing beams.
Step 2
Place a metal plate directly under the sloped or folded beam on the floor and place a 4-ton hydraulic jack on the plate. Measure the distance between the 10 cm x 10 cm beam and the hydraulic jack with a tape measure. Cut a second 10 cm x 10 cm beam slightly smaller than the length measurement.
Step 3
Place the beam between the nailed beam and the hydraulic jack. Raise the floor 3 mm every 24 hours until it is level. Do not exceed 3 mm, or you will damage the floor.
Step 4
Cut two sister wooden joists that measure the same height and length as the floor beams. If possible, cut the plates to match the length. If not, make them as similar as possible.
Step 5
Apply the construction adhesive to each sister joist’s face and place the sister beams on each side of the floor beam.
Step 6
Apply several rows of screws spaced across the sister joists to the entire length of the sister beam. This will secure the sister beams and attach the joist.
Step 7
Slowly lower the hydraulic jack and remove the 10 cm x 10 cm screwed plate from the entire beam.
Mistakes to Avoid when Trying to Sister a Floor Joist
Deciding to sister a floor joist is very important and should not be rushed to save time. As this is a repair of a defective or damaged floor beam, it is imperative to do this project correctly, and there are some significant mistakes to be avoided. Be prepared to become a bit dirty, but get solace in the fact that adequately fixing this problem will aid you in preventing significant hitches later. Some mistakes to avoid during this process include:

Failing to treat the initial problem
Most of the time, you need to connect the floor beams because of two problems: water damage, which leads to rot or damage caused by termites that have disintegrated the beam. You must address these issues first hand before implementing any restoration steps. If water damage occurs, make sure that any leaking piping or condensation problems have caused the rot. Mould is often associated with water damage, and it is good to solve this problem too.
If termites caused damage, call a professional exterminator to take proper care of the house if you haven’t done this already. If these problems are not resolved, associating the damaged floor beams is just a band-aid, and the damage will only happen again.
Notching or not lifting enough
Generally, you can make newer floor beams using 2x8s or new I-beams. Older houses, however, can have 2x6s. Although it is a good idea to replace the rotten material with 2x8s, a fit may be necessary between the sub-floor and the ledge plate. It is straightforward to cut the notches and remove debris in two quick cuts, but cutting the notches in this way weakens the structural integrity of the replacement wood. In situations where joining damaged floor joists with the wood of similar dimensions, it can be easy to carve and snap the sister board into place. However, this does not correct the slope the floor has taken since the old joists were damaged. Take some extra time and lift the damaged area so that the new wood does not need any carving.
Neglecting the Level
Generally, when a beam becomes a sister, the new wood does not cover the old beam’s entire length. Because of this, the end of the new wood does not get support. It is essential to set this level to prevent the floor from falling and prevent the sleepers from chipping later.
Read More: How To Create Fall In Bathroom Floor
Not Enough Security
The amount of weight that each floor beam handles is quite surprising. When putting these pieces together, it is easy to put just a few nails on the boards and move on. However, displacement and settlement can work these open areas and separate the plates. Ideally, use nails to fix the part temporarily and then lag screws or, more preferably, use transport screws to lock them together.
Banking on well-covered wood
Overlapping the new wood with good wood from the existing joist with just a few centimeters can be pretty straightforward. By doing this, you save wood but do nothing to protect the pieces. Overlapping boards by two feet or more is better.
Inadequate support
Rotting rarely occurs only in the center of the beam, but occasionally the most significant damage occurs there, and it may seem more straightforward to cover the rot. But, breaking into a winery, where the new wood does not get supported by the central beam or the accounting panel, often worsens the problem. Make sure to start a sister joist where it is supported.
How to Sister a Floor Joist: FAQs
How much does it cost to sister a floor joist?
Sistering a floor joist usually costs around $100 to $300 per joist.
How much sister should joists overlap?
There is no need for sister joists to overlap for more than 6 inches. Many overlaps are also wrong because if you place the load in the joist’s center, the end of the overlap may sag slightly.
How much strength do sistering joists add?
As earlier highlighted, sistering joists usually add much more strength when appropriately used.
Conclusion
In conclusion, sistering a floor joist comes with immense merits. Furthermore, you can learn the steps on how to carry out this process from the highlights above.


