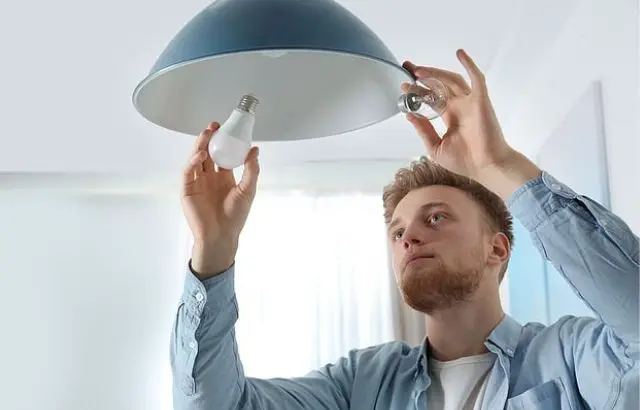
Nowadays, changing a light bulb may seem like a no-brainer. However, replacing a light bulb in a ceiling fixture can be a bit of a hassle. However, nowadays, there are many ways to solve such problems, even in the most complicated place. Nevertheless, it is important to know how to change light bulb in ceiling fixture. It doesn’t matter if it is an incandescent bulb, recessed or fluorescent. It might be useful to use a stool or ladder. Also, it is important that you turn off the light switch and do not handle the bulb until it is cool to the touch.
How to Change Light Bulb in Ceiling Fixture
Turn off the lamp and allow the bulb to cool.
- To change the light bulb in a hanging fixture, all you have to do is turn off the lamp and let the light bulb cool.
- Safety first! Before changing any light bulb, you should always make sure you have turned off the light switch. Also, have the proper tools.
- Most incandescent and halogen light bulbs get too hot to touch. Therefore, you should let them stand while they cool down before attempting to replace them.
- Before touching the bulb, you should bring the back of your hand close to it. This way, you can use your hand to measure how hot it is.
- Fluorescent bulbs do not get very hot and may not need much time to cool down. This is because its function is to produce light without emitting much heat.
Learn More: How To Make A Rear Projector Screen
Use a ladder or stool to reach the light fixture.
- Do not try to stand on a chair or other object that is not as sturdy.
- If you cannot reach the bulb with a stool, you need to use an A-frame ladder.
- Under no circumstances should it be placed on the top step of a stool or ladder.
Loosen the screws if you are replacing the bulb in a dome or fan fixture
- Most glass dome ceiling fixtures usually have at least one screw holding the dome in place.
- So if you are changing the bulb as a type of dome fixture, the first thing you should do is locate the screw on the side where the dome meets the ceiling.
- However, to change the light bulb in the ceiling fan, you must check the dome’s base to connect to the fan body.
- At this point, it is necessary to hold the dome in place. All this while turning the screw counterclockwise to loosen it.
- Instead of removing the screw completely, loosen it until you can remove the flat ceiling light cover.
- This may be easier for you. This way, you can remove the dome without dropping it, and you won’t have to deal with trying to put the screw back into the hole.
- In case your dome does not have screws, check the tip in the center of the dome.
- Check that you can turn it counterclockwise; the tip may hide a nut and bolt that secure the dome. Be sure to hold the dome while loosening the bolt.
- If your fixture does not have a glass dome or glass cover, you can move directly to remove the bulb.
Remove a sturdy glass dome with duct tape, if necessary.
- You must remove the ceiling light cover with clips. If the cover is stuck, cut an approximate 6 inch (15 cm) length of duct tape.
- Grasp the ends of the ribbon and fold the center section in half to make a handle.
- Do not allow contact between the adhesive ends while bending the middle part. As a result, a T-shaped handle should be obtained, making the middle part with two sticky ends on each side.
- You should then repeat the steps to make another tape handle. At this point, you should stick the tape handles to the glass cover, then use them to turn the cover counterclockwise.
- Alternatively, you can try spraying some lubricant around the edge of the cover where it threads into its housing. To do this, use a fine nozzle adapter to reach the tight crevice between the cover and its housing.
Remove the used lamp from the bulb holder.
- Verify that the lamp is off and the bulb is cool to the touch. Turn the bulb counterclockwise while removing it from the socket.
Purchase a replacement bulb of equivalent wattage
- Check the old bulb for wattage markings. If you do not have a matching bulb on hand, purchase a new bulb with the same wattage as the old one.
- In replacing a normal incandescent bulb, consider replacing it with a CFL (compact fluorescent) or LED bulb of equivalent wattage. These alternatives use 70% to 80% less energy than incandescent bulbs.
Install the new bulb
- Please insert the new bulb into the socket and then turn it clockwise until it is tight. Be careful not to turn it too much, or it may break.
- Before storing the ladder or stool, turn on the lamp to verify that the bulb works. If it does not light, try a new bulb or check the circuit breaker. If all else fails, the device will probably have to be modified.
- Replace the device’s glass dome or any other cover if necessary
- While you have it, clean the dome or cover it with glass cleaner. Make sure it is dry, then replace it by reversing the steps you followed to remove it.
- If the cover screws into housing, check its threads and those of the housing. If there is any buildup, clean the threads to make it easier to screw the cover in place.
- Secure the bracket in place and tighten the screw or bolt at the same time with the other hand. Hire a helper if you have trouble doing both at the same time.
- Changing a recessed light bulb
Look for a metal ring that holds the bulb in place.
• A holding collar that overlaps the bulb’s face is often required to hold recessed light bulbs in place. You must take a few precautions before replacing the bulb in the recessed ceiling light with the cover.
• If there isn’t a collar, there has to be a thin space between the housing and the bulb. Remove the collar to change the bulb if there is no space and you can see a metal ring covering the edge of the lightbulb.
• Keep in mind to search for a metal tab using a ladder or stool. Ensure the bulb is cold and that the light is off.
• You may go immediately to remove the bulb if there is no metal ring and just a little space between it and the housing.
Remove the retaining collar by turning it counterclockwise, pressing a button, or removing the screws.
- Before attempting to remove the collar, check to see if you can turn it counterclockwise. For some recessed fixtures, push up slightly while turning the housing 1/4 to 1/2 turns counterclockwise.
- The bulb and socket are then released and can be pulled out of the housing.
- Use light pressure when attempting to rotate the collar. Pulling it with force could damage it.
- For newer designs, press a small release button or remove a screw to remove the retaining collar.
- Older versions employ a metal ring with a spring, which can be carefully removed with a flat-blade screwdriver.
- To remove a spring-loaded ring, insert the screwdriver between the outer ring and the retaining collar. Being careful not to hit the bulb, apply gentle inward pressure on the collar.
- The spring collar expands to hold the bulb in place.
- Your goal is to lever the collar inward to make the ring smaller to release from the housing. Try to keep one hand on the collar so it doesn’t fall off when you release it.
Remove the bulb by turning it counterclockwise.
- If you have a lamp with a collar, rotate the bulb out of the socket after removing the collar.
- While they are more cumbersome, one advantage of the collars is that you can remove both the bulb and the socket. This makes it easier to grip and rotate the bulb.
- Depending on the type of bulb, turn it 1/4 or 1/2, turn counterclockwise, or keep turning it until it pops out of the socket.
Use tape to unscrew a bulb that does not have a collar.
- Collarless fixtures do not leave much room between the bulb and the housing for your fingers.
- To hold the bulb, make a handle out of a 6-inch (15 cm) strip of tape.
- Take the strands and fold the ribbon in half to make a handle in the center section.
- Don’t allow the ends of the tape to touch each other; you should have a T-shaped handle with two sticky ends on each side. Stick the ends to the bulb, grab the folded center section of the tape, twist it counterclockwise, and then remove it from the socket.
Buy a new bulb to match the old one.
- With so many recessed LED bulbs out there, it cannot get the right replacement.
- If not knowing the specific type of bulb needed, take the old one to the hardware or home improvement store. Look for a bulb that matches the same wattage as the old one.
Install the new bulb
- Recessed LED bulbs with 2 or 3 pins, align the pins with the socket holes, and turn them clockwise.
- Alternatively, if there are no pins insert the bulb end into the socket and turn clockwise.
- If you have a fixture without a collar and cannot hold the bulb, use the tape handles to twist it into place. Keep an eye on fixture wiring.
- After installing the bulb, please turn on the switch and verify that it works.
Replace the retaining collar, if necessary
- If you wish to replace the collar, you must perform the opposite operation to the one performed to remove it. Turn it to the right and put it in place, replace the screw, or tighten the spring-loaded metal ring on the housing.
- Replacing a Fluorescent Bulb
Remove the diffuser from the fixture.
- This is the plastic cover that covers the housing. For non-flush-mounted fluorescent lights, lift and pull the diffuser’s edge off an edge on the fixture housing.
- If your fixture is recessed, use a flathead screwdriver to pry down the metal strips that frame the diffuser.
- In case you do not know how to remove the diffuser, carefully press and pull on one side of the diffuser. Try at the same time to see if it grips an edge to hold it in place.
- Push up toward the ceiling, and then gently pull the edge of the diffuser outward so you can slide it over the lip.
- Note the steps below for removing the diffuser to make it easier to reinstall.
- Don’t forget that you have to stand on the sturdiest ladder or stool rather than on a chair. The ladder or stool should be tall enough so that you can comfortably reach the fixture without standing on your tiptoes.
Unplug the bulb by turning it 90 degrees
- Be sure to disconnect the appliance from the light to change the bulb. Grasp the long tubular bulb with both hands at the same time and turn it 90 degrees, or 1/4 turn, to one side
- This will align the prongs with the slots in the sockets so you can remove the bulb.
- Lower one end down from the socket, then pull the bulb out of the fixture.
- The fluorescent lamp does not emit a large amount of heat, so it should be cool to the touch.
- Just in case, put your hand in front of the bulb to check if it is hot.
- Since fluorescent bulbs are very long, it is common to miss a section and hit something accidentally. Pay close attention to the surrounding things and handle the bulb carefully.
Read More: How To Install Heat Lamp In Bathroom
Purchase a matching replacement bulb
- Check the inside of the light fixture for an information label. It should tell you the length of the bulb and the wattage you’ll need. Learn to paint brass light fixtures.
- In any hardware store, you can buy a lamp with the same wattage.
- If you don’t see an information label, you can always measure the old bulb’s length or check for markings indicating its length and wattage. Often stack exchange communities will solve the problem. Yes! Try a Stack Exchange!
Place the pins of the new light bulb into the socket slot.
- Look for the narrow slots in the sockets where the bulb tips fit. Insert the teeth into the slot at one end, then slide the prongs on the other end into place. After sliding both ends into the socket, turn the entire bulb 1/4 turn clockwise.
- Verify that the light works before replacing the diffuser. If it does not work, turn the light switch off and recheck the connection between the plugs and sockets. If this still does not work, it is necessary to replace the plugs.
Replace the fixture diffuser
- You should check the fixture wires first. If the fixture is not recessed, place it along the edge of the diffuser over the edge that runs along with the fixture.
- Keeping that edge hooked over the rim, rotate the diffuser to bring its other long edge toward the fixture.
How to Change Light Bulb in Ceiling Fixture: FAQs
How do you remove a ceiling light cover?
If you cannot remove the fixture with your hands, use the flathead screwdriver knife or a flat head knife to pry it out by sliding it under the mouth of the metal collar and prying downward. The lamp will stay in place while you change the bulb. Replace the current bulb with a new one
Do you need to be an electrician to change light bulbs?
You do not need to be a qualified electrician for this job.
How do you change a light bulb on a high ceiling?
If your ceiling is extremely high, you need to use a ladder with extreme care and replace your bulb as required.
Conclusion
In the current community, changing a light bulb may sound like an easy task. However, you are working with electricity, and when it comes to this issue, the most important thing is to keep safety standards as a priority.
The online community can help you if you have any other questions on this topic. Try the community for developers to find more answers.


